

In this article, we will introduce how to create an event on Pigeonhole Live and how to embed the created event in Brightcove Gallery.
## 1. Creating an event in Pigeonhole Live
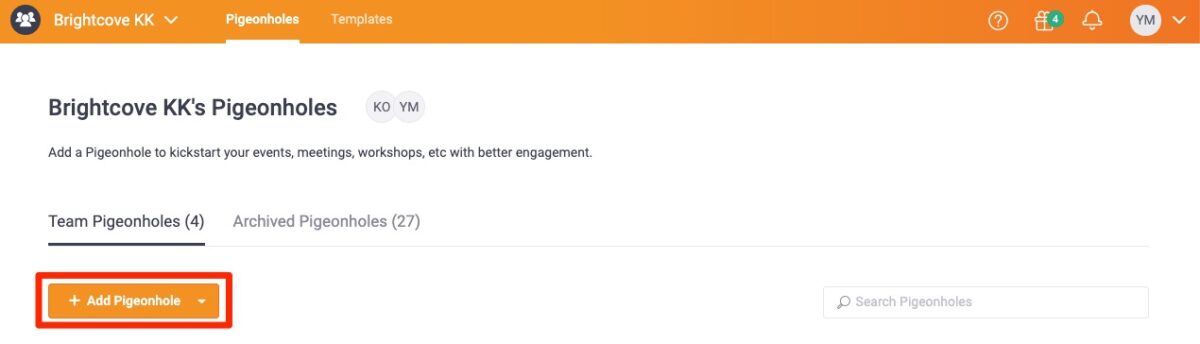
The operations required to create an event in Pigeonhole Live have been designed to be as minimal as possible. First, create an event in Pigeonhole Live that you can embed in Brightcove Gallery. After logging in, make sure that “Pigeonhole Live” is selected in the top menu. An orange “Add Pigeonhole” button will appear on the screen, so click on it.
The “Set Up Your Event” pop-up will appear on the screen. Here you can set the event name, summary, usage period, and “Passcode”. The information you enter here can also be edited in “Event info” after creating the event.
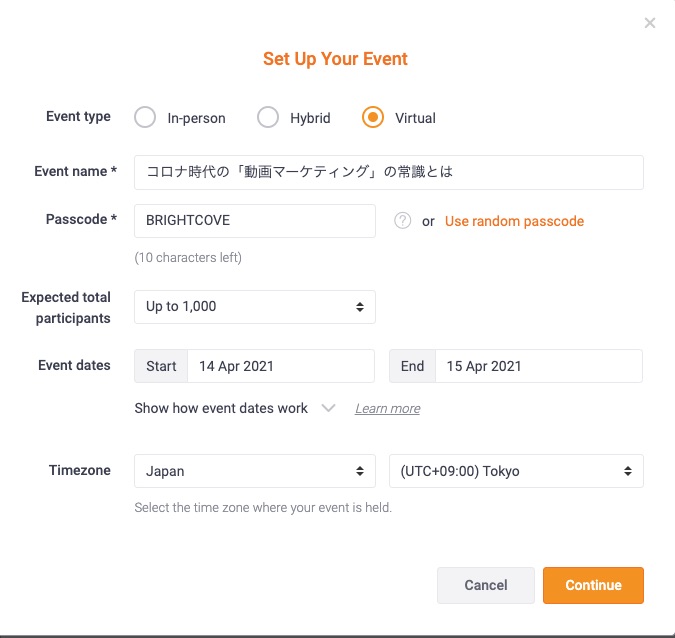
The “Passcode” is a password required to enter the Pigeonhole Live event page. Participants can access the event by entering the “Passcode” shared by the organizer from the [Pigeonhole Live website](https://pigeonholelive.com/). If you are embedding Pigeonhole Live in a Brightcove Gallery, you will not need to use this passcode very often, as Pigeonhole Live will be embedded next to the video player.
Once you have completed the “Set Up Your Event” form, click “Continue”. This completes the creation of your event. From here, you will register the event information.
## 2. Register the speaker information in “Speakers
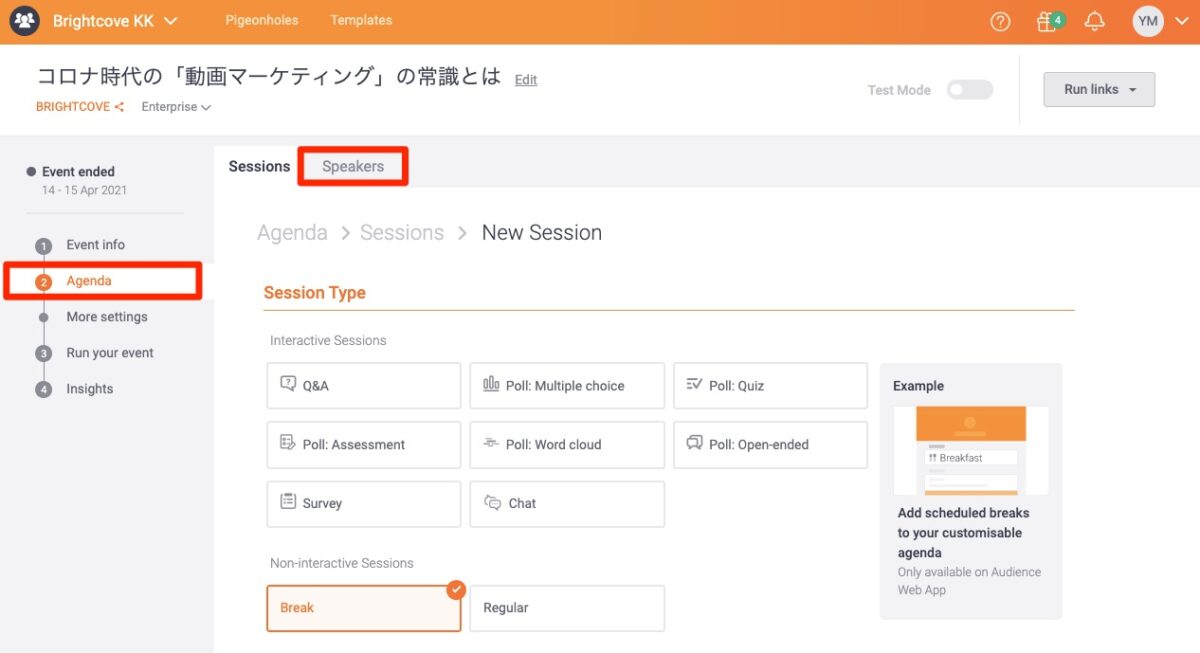
This is the screen for entering event information. You can register information about sessions and speakers in “② Agenda” in the sidebar. When you first move to this screen, the “Sessions” tab will be selected. First, switch to the “Speakers” tab. You can create all the “Sessions” first and then register the “Speakers”, but we recommend registering the “Speakers” first, as it is more efficient to assign the “Speakers” at the same time as creating the “Sessions”.
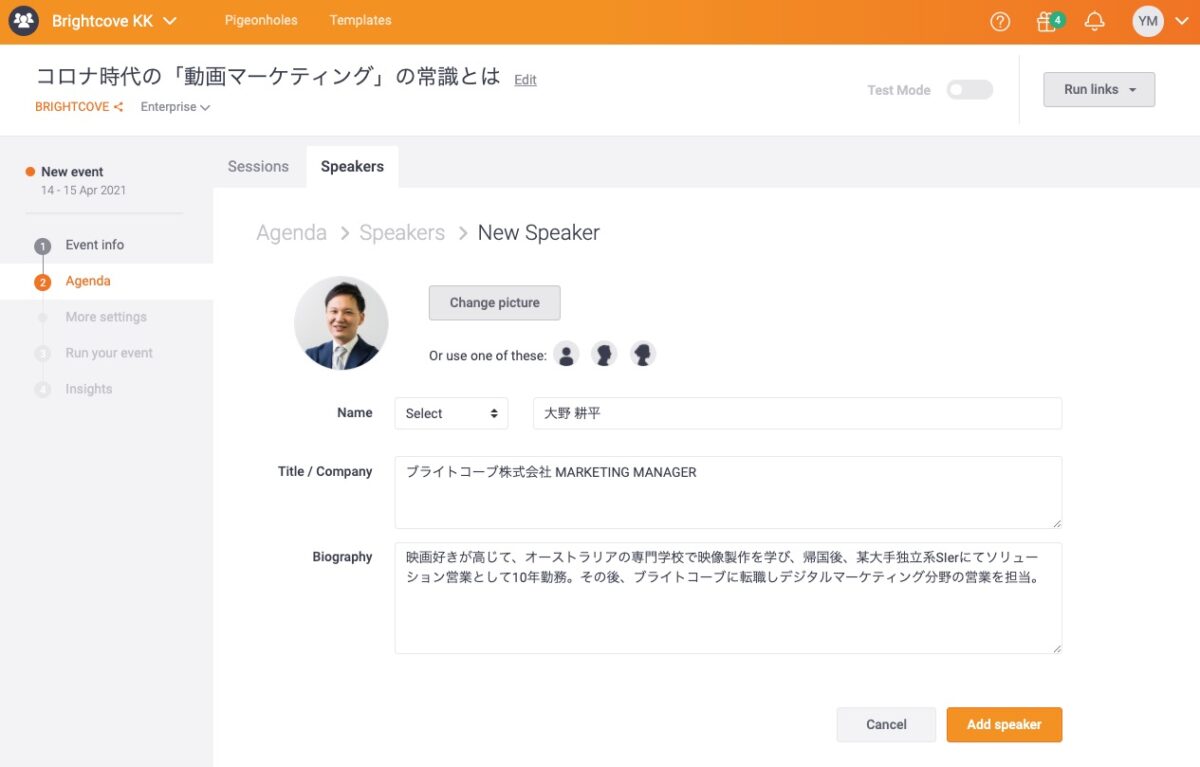
This is the image that will be registered as the speaker. Upload an image using the “Change picture” button, and then enter your profile information, including your name, affiliation/position, and introduction. When you have finished entering the information, click “Add speaker” to complete the registration. Please follow this procedure to create a speaker for each speaker.
## 3. Register session information in “Sessions
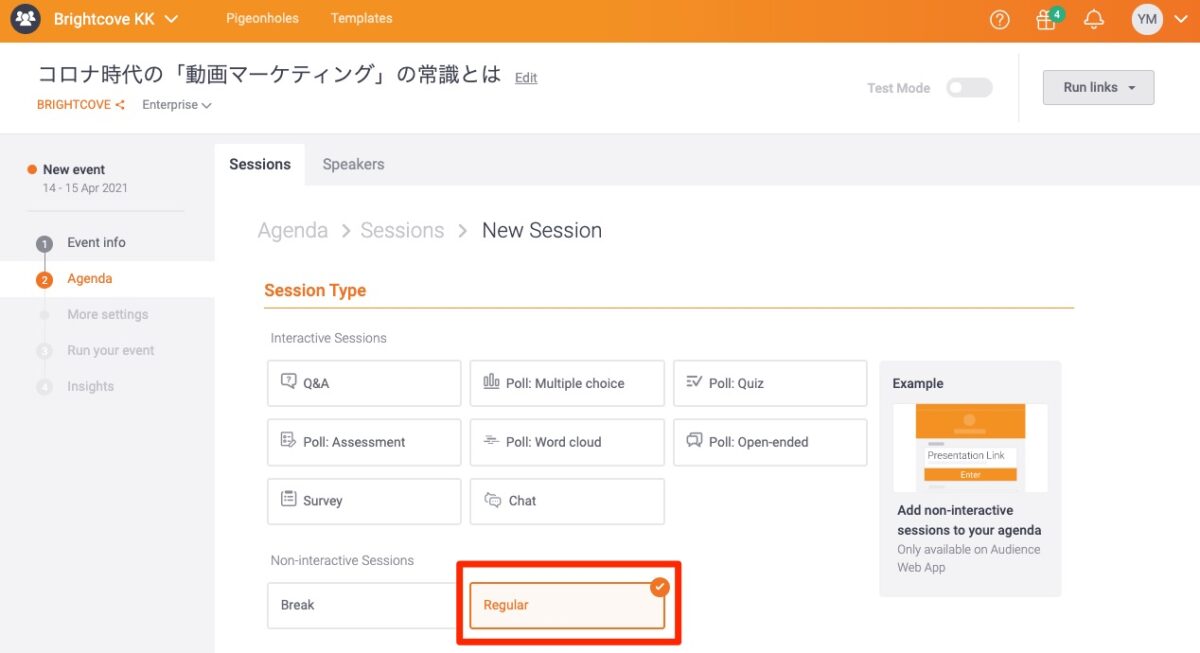
After registering the speakers, you can now register the session from the “Sessions” page. Please select “Regular” for the “Session Type”. Regular” is classified as ‘Non-interactive Sessions’ under ‘Session Type’, and is used to display static information such as the session title and content.
Please enter the session name, start and end times, and session details. If you click on “+ Add moderator” or “+ Add speaker” under “Speaker(s)”, a “Select Moderator” pop-up will appear. Here, a list of the “Speakers” you registered earlier will be displayed, so please select the Speaker(s) related to the session. When you have finished, click on “Save Regular” to save. Please do this for each session you are holding. If there is a break between sessions, please use “Break”.

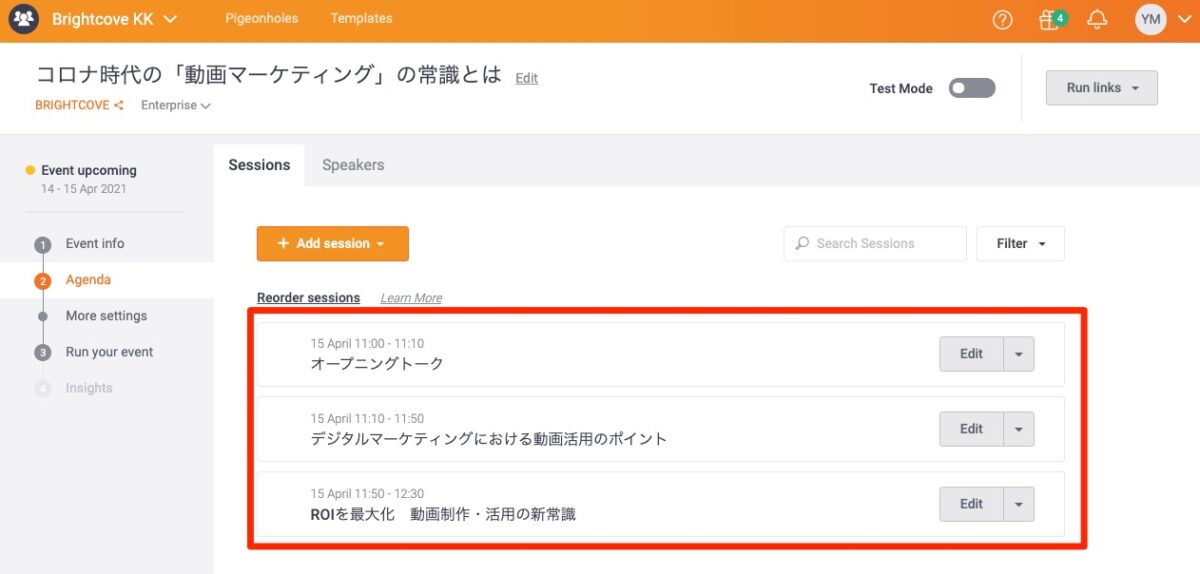
Once you have registered for each session, a list of sessions will be displayed. Next, we will prepare interactive sessions for two-way communication with viewers, such as “Q&A”, “polls”, and “chat”.
## 4. Preparing for “Q&A”, “Voting” and “Chat” and linking them to each session
Once you have prepared each session, you can then add interactive functions such as “Q&A”, “Voting” and “Chat”. These functions can be set up as independent sessions in the same way as Regular, but they can also be prepared in a way that links them to each session prepared in Regular. In this article, we will introduce the procedure for linking each session to a “Nest Session”. For the specific details of the available sessions, please refer to the article [Interactive Functions of Pigeonhole Live](https://www.brightcove.com/ja/resources/blog/pigeonhole_live_2).
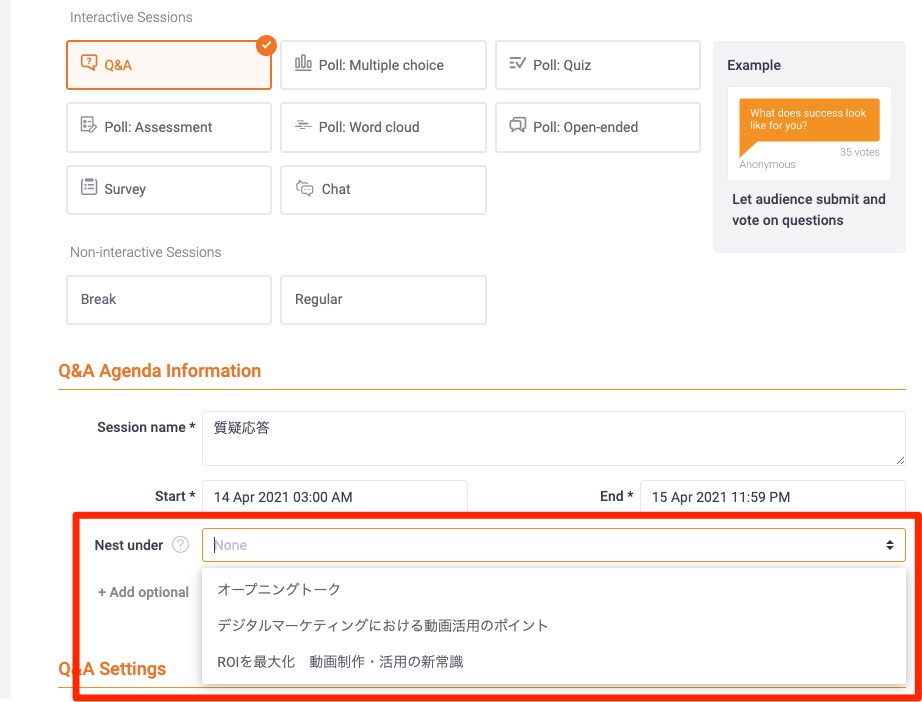
Just like with Regular, select the function you want to add from the “Interactive Sessions” menu. After selecting, click on the “Nest Session” button under the “+ Add optional” section of the “○○ Agenda Information” (○○ will be replaced with the name of the function you selected). A “Nest under” section will be added, and you will be able to select the session you have already created, so click on the session you want to link to.
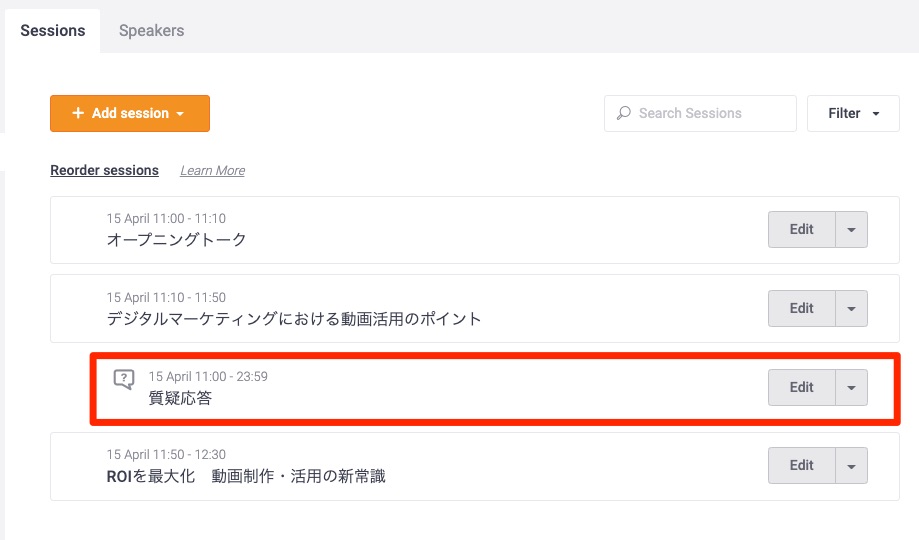
If you save and return to the session list, you can see that the functions you set in “Nest Session” are arranged under the existing session.
So far, we have finished the basic settings for “Agenda”. Next, in the “More settings” sidebar, we will get the iframe tag to embed in Brightcove Gallery.
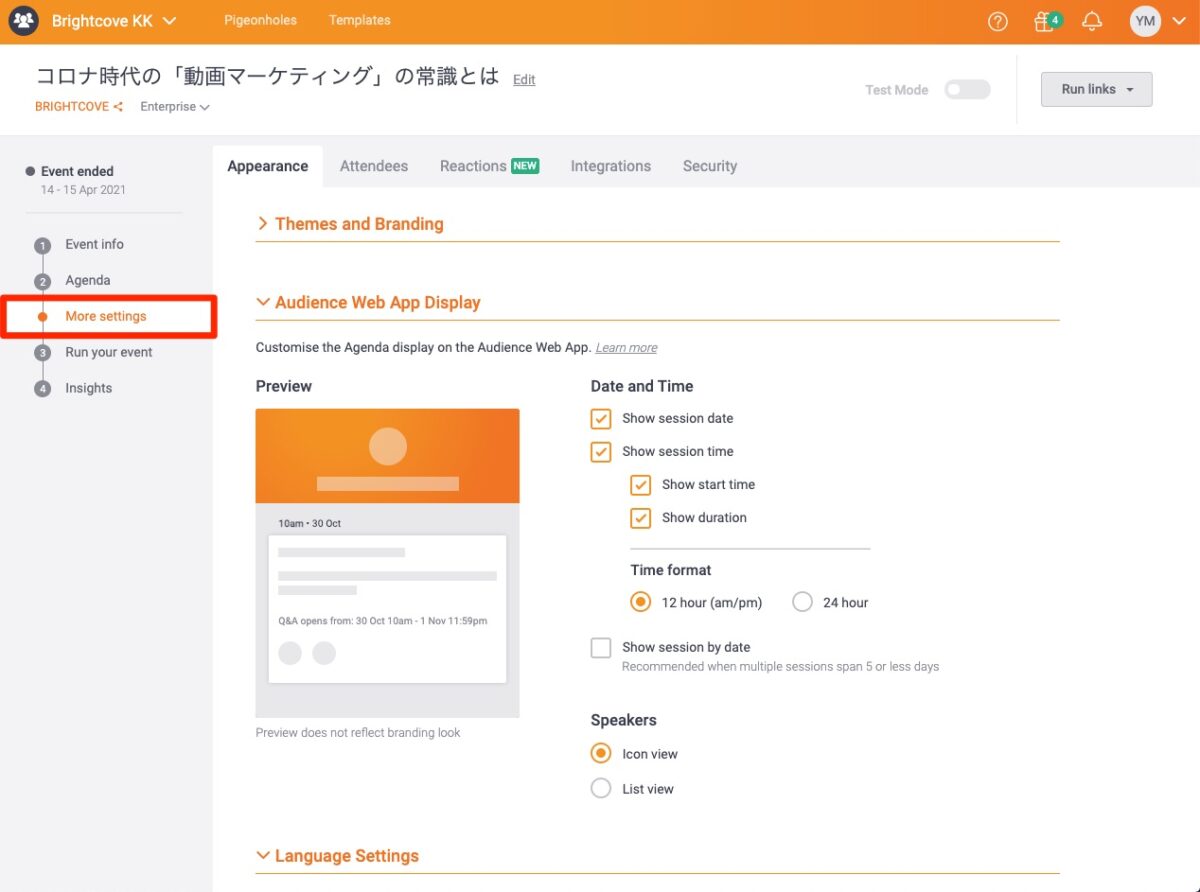
## 5. How to embed the Pigeonhole Live you have created into Brightcove Gallery
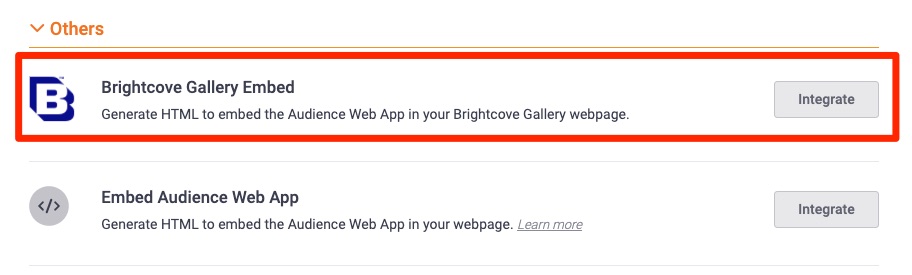
From the “More settings” menu, select “Integrations”. In the list of services that can be integrated, there is a menu called “Brightcove Gallery Embed”, so click “Integrate”.
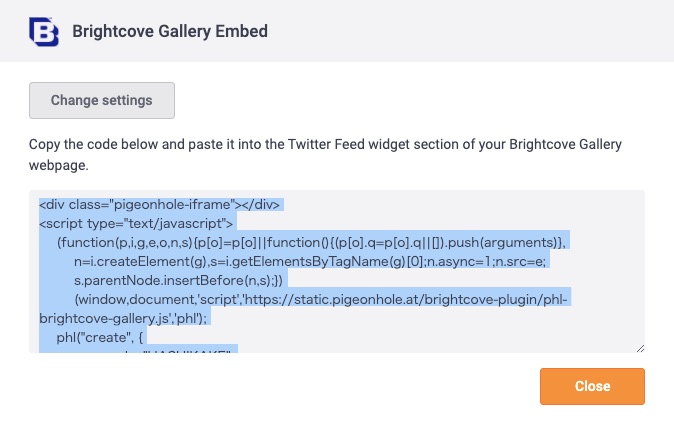
Clicking on it will allow you to obtain the embed code (iframe tag for embedding) for embedding in the Brightcove Gallery, so click on “Get embed code” and copy the code for the event you have created. This completes the settings for Pigeonhole Live.
## 6. Embedding the Pigeonhole video you created in Brightcove Gallery
Please log in to Video Cloud and select “Gallery” from the menu. You will be taken to the Brightcove Gallery screen.
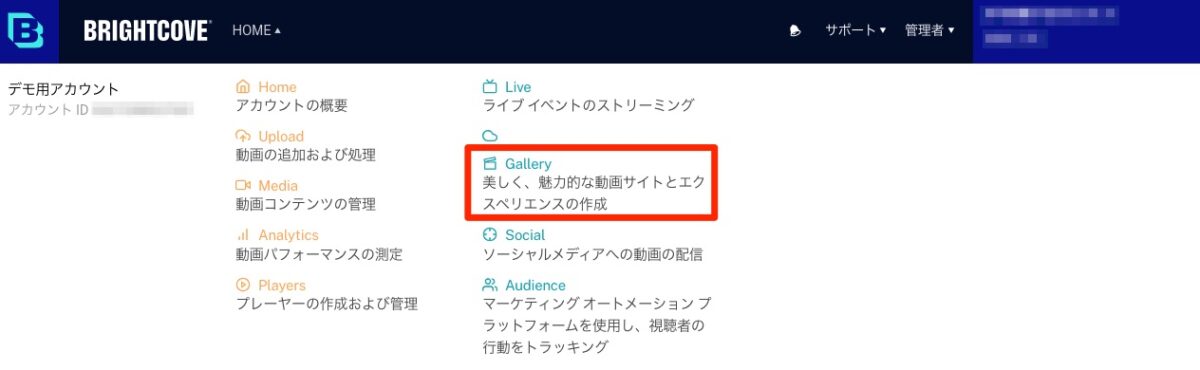
Once you have moved to the Brightcove Gallery screen, click on “New Experience”. You will be taken to the page for creating a new Brightcove Gallery.

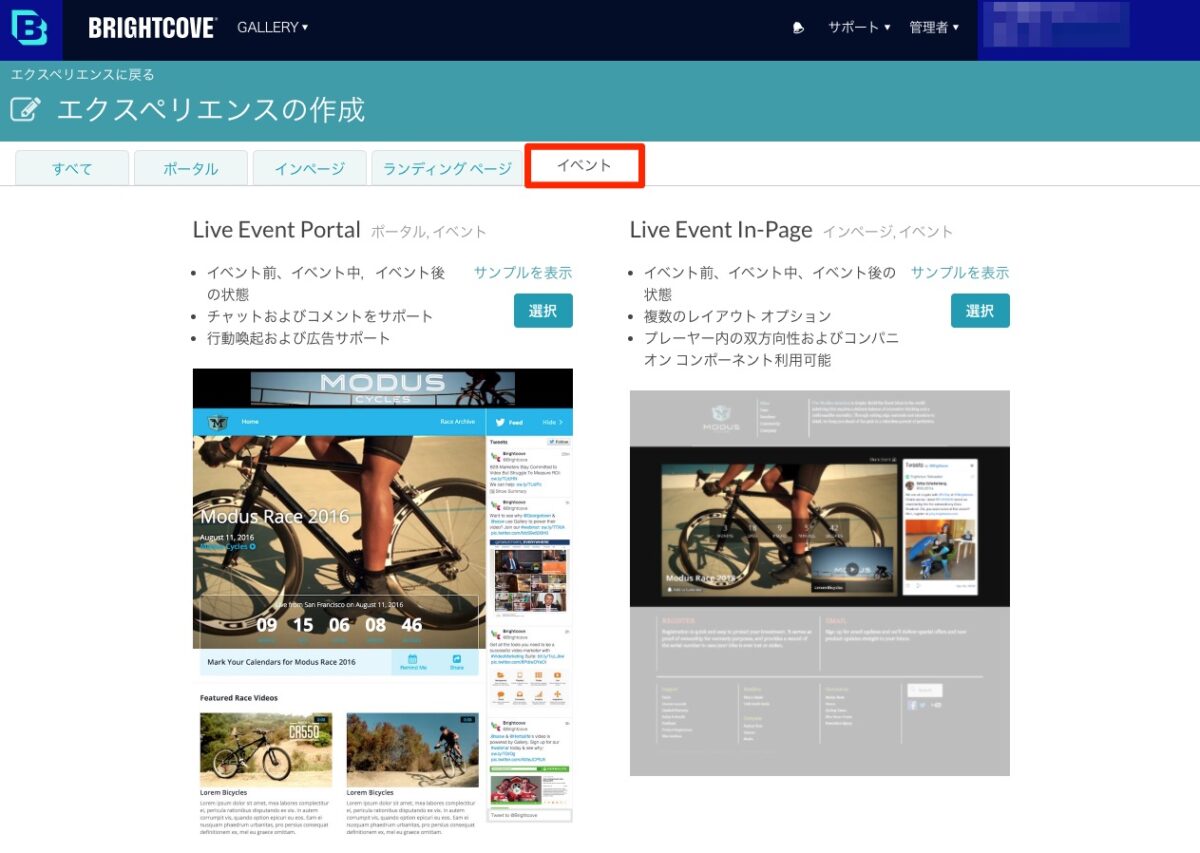
You can choose a template, so please select “Event” from the five tabs. This time, since it is assumed that it will be used for live streaming, please select “Live Event Portal”.
The method of embedding “Live Event In-Page” will be explained in the next chapter. Please refer to [this document](https://ja.gallery.support.brightcove.com/get-started/overview-gallery-experiences.html) for the difference between “Portal” and “In-Page”.
## 7. How to embed Pigeonhole in the Live Event Portal
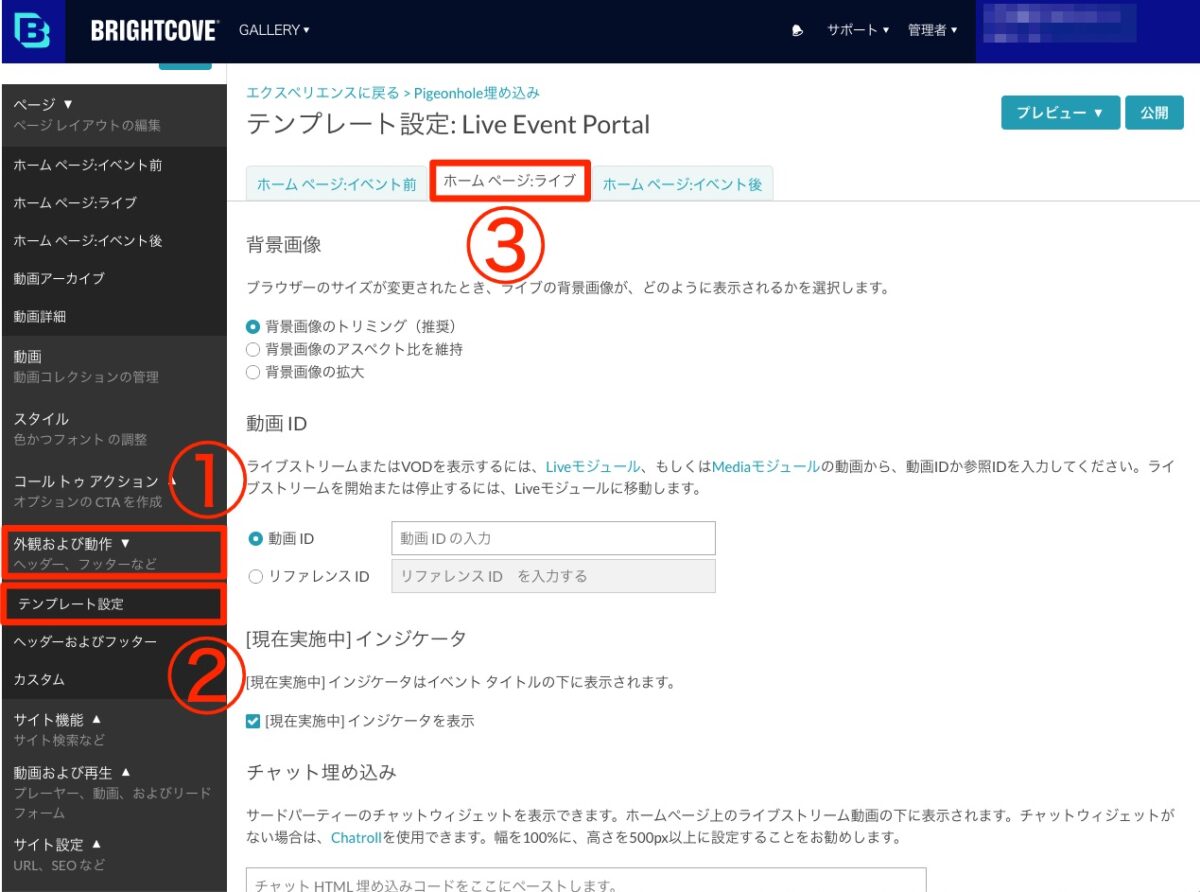
After moving to the Brightcove Gallery settings screen, click “①Appearance and Behavior” from the menu on the left. Three menus will be displayed: “Template Settings”, “Header and Footer”, and “Custom”. When the screen changes, the tabs “Before Event”, “Live”, and “After Event” will be displayed, so select “③Live”.
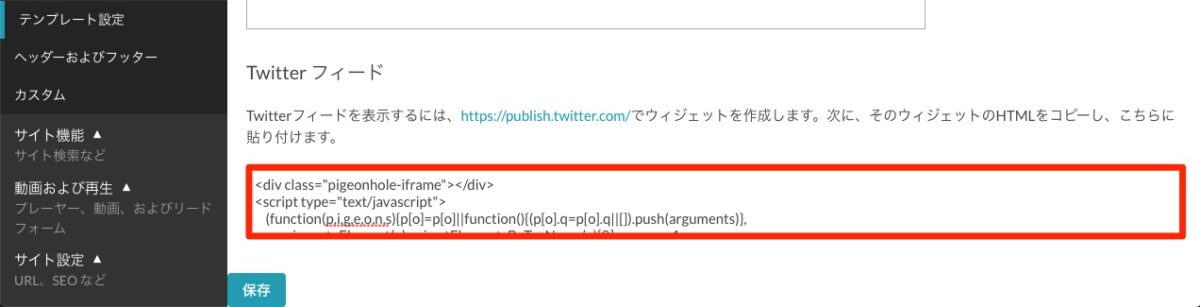
If you scroll down the screen, you will see an item at the bottom called “Twitter Feed”. There is a blank space below that, so please paste the Pigeonhole tab in as shown in the red frame. Press the save button below, and you will have finished setting up Pigeonhole for Brightcove Gallery.
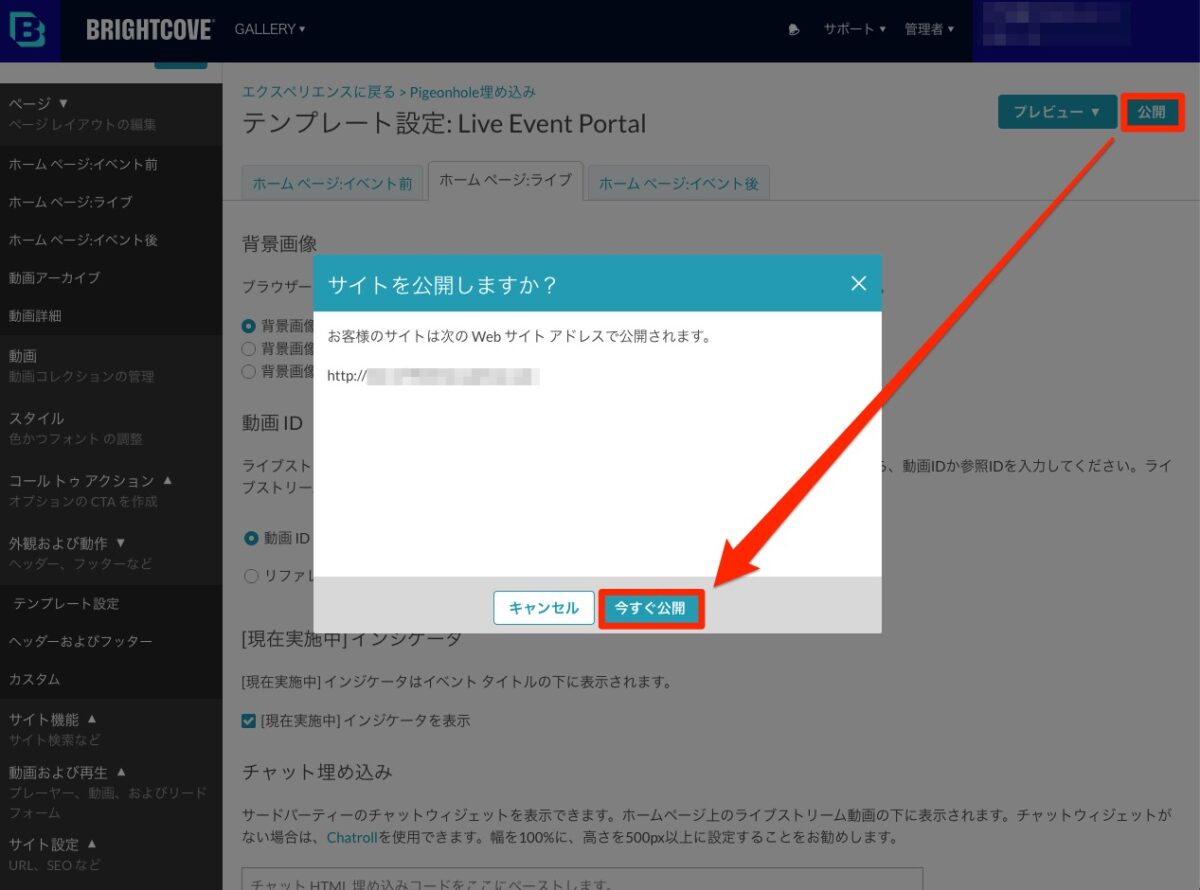
Finally, click on “Publish” in the top right corner of the screen to publish your Brightcove Gallery and all your settings will be applied. This completes the Pigeonhole settings for the “Live Event Portal”. If you would like to add Pigeonholes to the “Before Event” and “After Event” screens, you can do so by switching between the tabs and following the same procedure.
## 8. How to embed Pigeonhole in Live Event In-Page
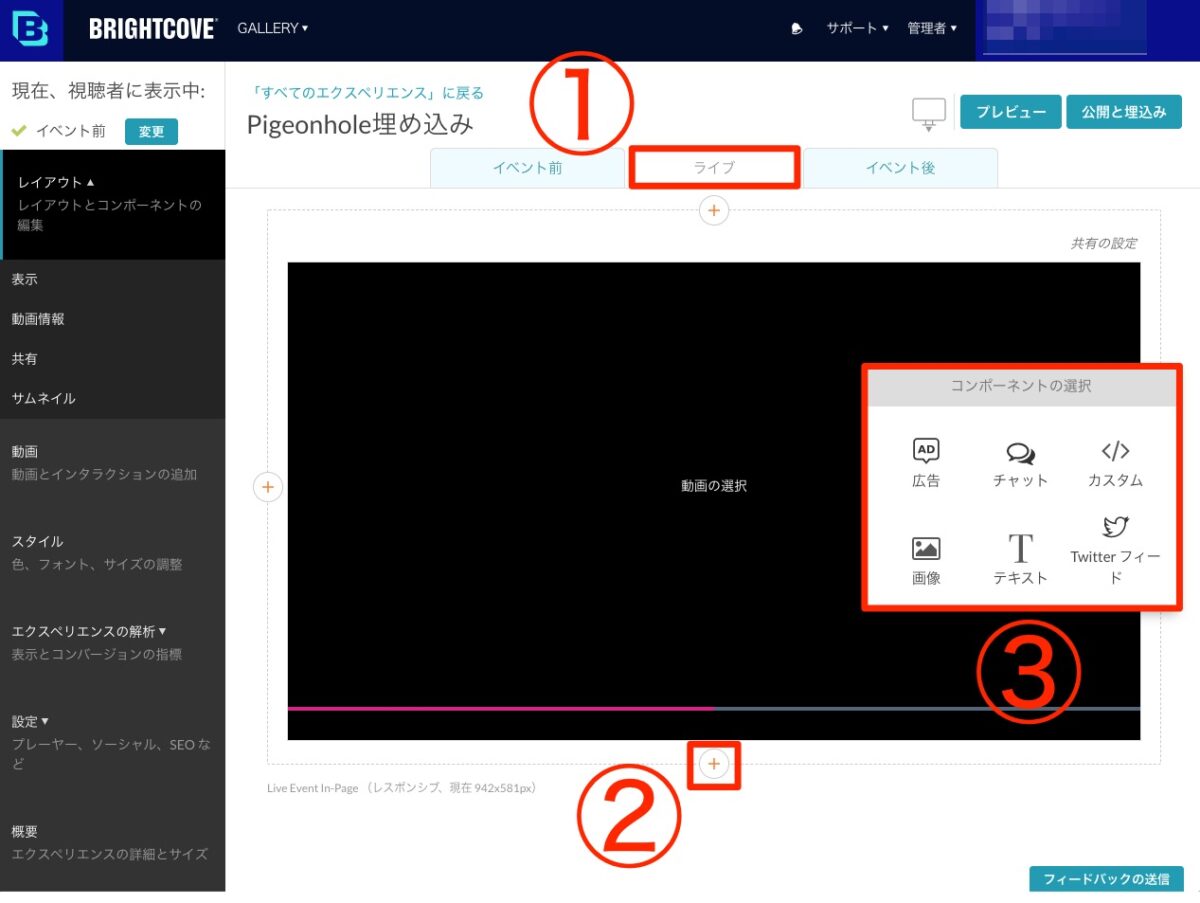
The method for embedding in Live Event In-Page is simpler than Live Event Portal. When you open the settings screen, select “① Live”. There are “+” buttons on the top, bottom, left and right of the video player. Click the “+” button where you want to set Pigeonhole. When you click it, a pop-up will appear to add the element in ③.
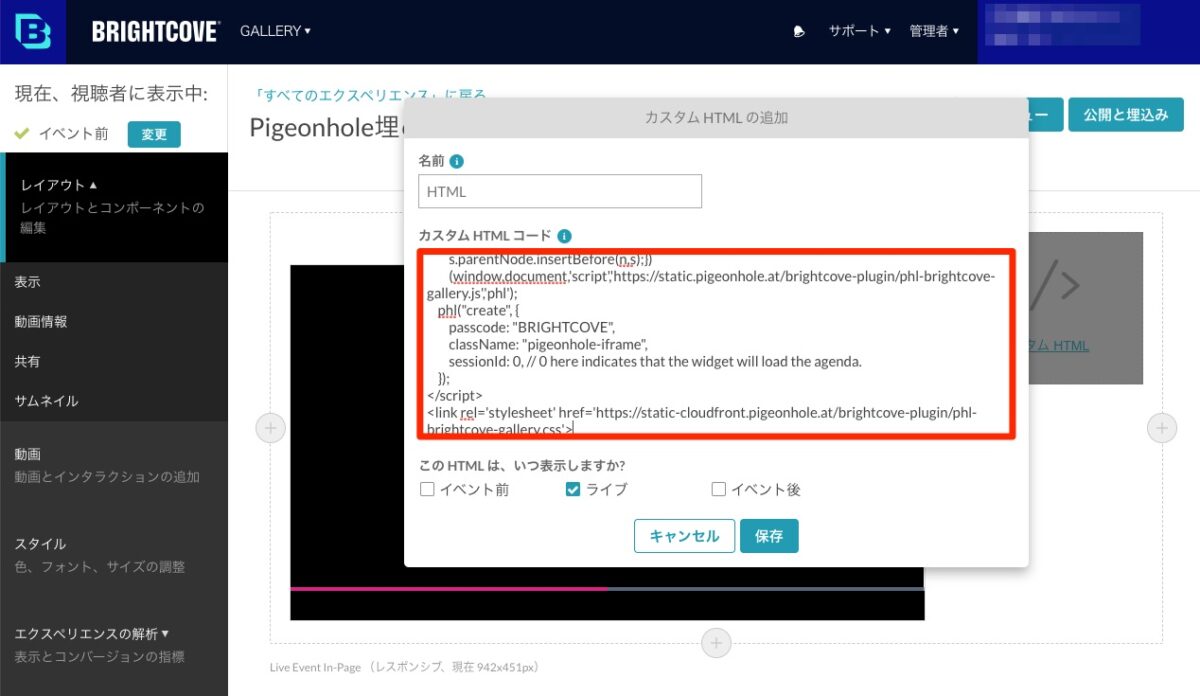
Clicking on ‘Custom’ will display a screen for embedding HTML. Paste the code copied from Pigeonhole into the box under ‘Custom HTML code’. If you also want Pigeonhole to display before and after the event, click on this screen to save it. The subsequent publishing procedure is the same as for the Live Event Portal.
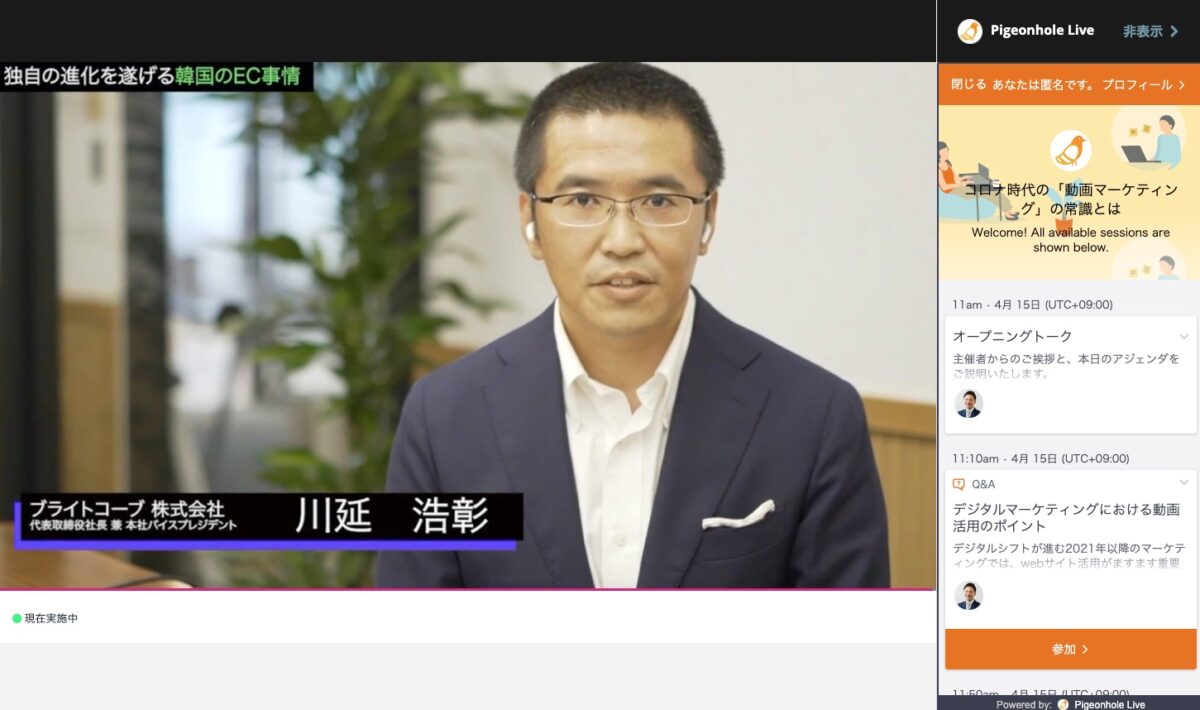
You have now completed the settings for using Pigionhole Live for online events. If you need to make changes to the content after embedding, please be assured that any modifications you make from the Pigionhole Live administration screen will also be automatically reflected in Brightcove Gallery.
## 9. How to use: Explain to participants at the start of the online event
Using Pigeonhole Live enables two-way communication, but it won’t be effective if event participants are hesitant to use it or don’t know how to use it. Before the online event starts, the host or speaker should actively encourage people to post comments and demonstrate how to use it, so that they can lower the barrier to use.
Brightcove is selling this “Pigeonhole Live” as “Event Based Interactivity” on an OEM basis. It is only available for sale through Brightcove to users of Brightcove Video Cloud or packaged products that include it. If you would like more information, please contact us [here](https://www.brightcove.com/ja/contact-sales).


