
In the previous post (https://www.brightcove.com/ja/resources/blog/live_stream_chat_1/ “previous”), we introduced how to set up <a href=“https://chatroll.com/” target=“_blank” title=“Chatroll”>Chatroll</a>. This time, we will introduce the integration between our products [Brightcove Gallery](https://www.brightcove.com/ja/products/gallery/ “Brightcove Gallery”) (video portal site construction function) and [Brightcove Live](https://www.brightcove.com/ja/solutions/live-streaming/ “Brightcove Live”).
__Table of Contents__
– [1. About Brightcove Gallery](#1-brightcove-gallery)
– [2. How to set up Brightcove Gallery](#2-brightcove-gallery)
– [3. How to set up Video ID](#3-video-id)
– [4. Reflecting settings](#4-)
## 1. About Brightcove Gallery
Brightcove Gallery is a feature that allows you to easily build a video portal site. You can build a video portal site that matches your company’s brand image from the following templates.
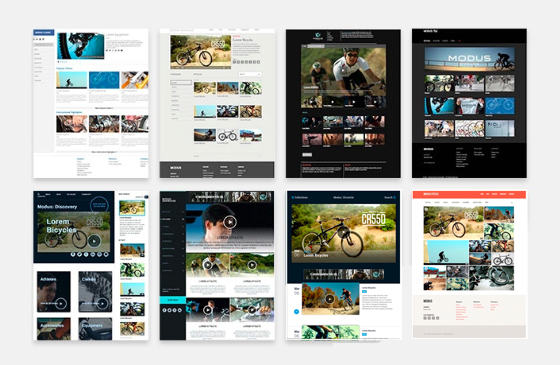
In addition to this “Portal” template, in 2017 a new “In-Page” template was also released, which allows you to embed video playlists into your existing website. (For more details, see [here](https://www.brightcove.com/ja/resources/blog/gallery-inpage-part1/ “here”)
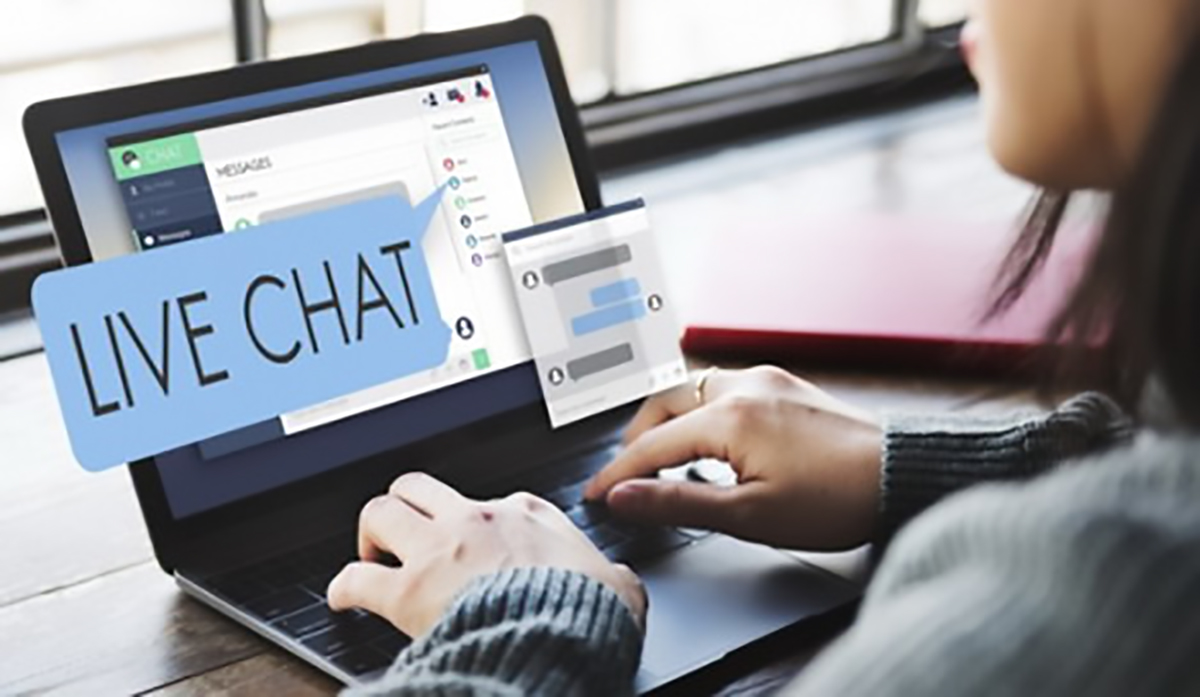
You can use Chatroll with either the ‘Portal’ or ‘In-Page’ features. In this example, we will show you how to use the ‘In-Page’ feature to implement a chat function when broadcasting live.
*Brightcove Gallery has various settings, but this time we will introduce the minimum settings. For information on Brightcove Gallery specifications and how to make settings, please refer to [here](https://ja.gallery.support.brightcove.com/get-started/getting-started-brightcove-gallery.html “here”). If you have any questions, please contact our technical support based on the support conditions of your contract.
## 2. How to set up Brightcove Gallery
Please log in to Video Cloud and select the Gallery module. After the transition, please click on “New Experience” displayed in the upper left corner of the top screen of the Gallery module.

)
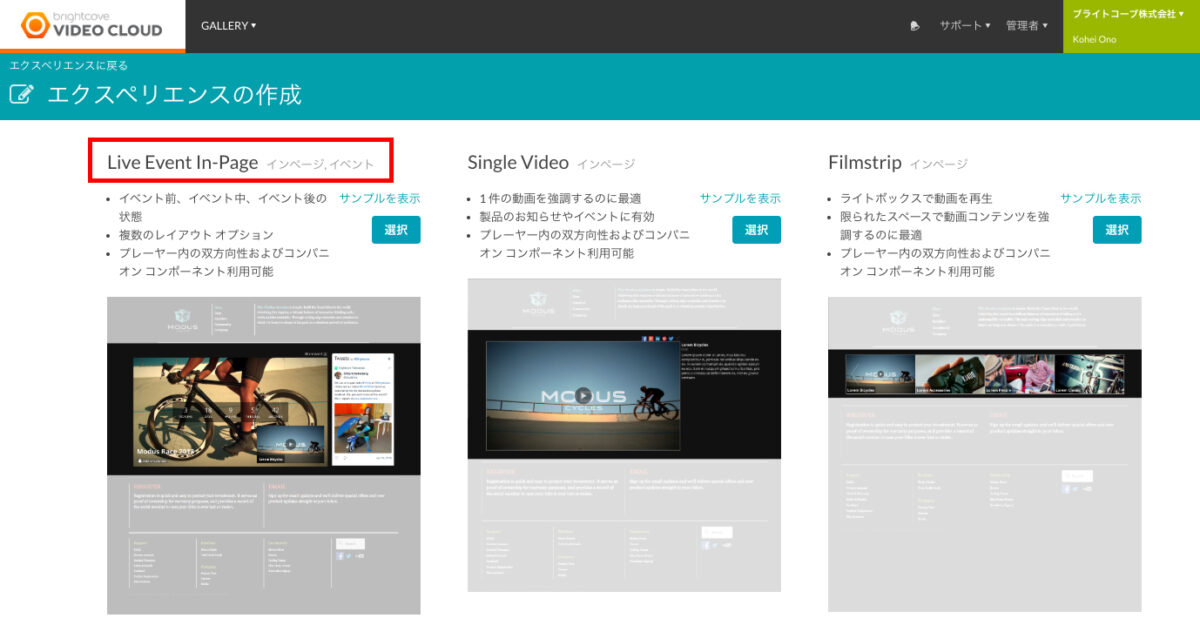
After the transition, please click on the third tab from the left, “In-Page”. This will display various templates, so please select “Live Event In-Page”.
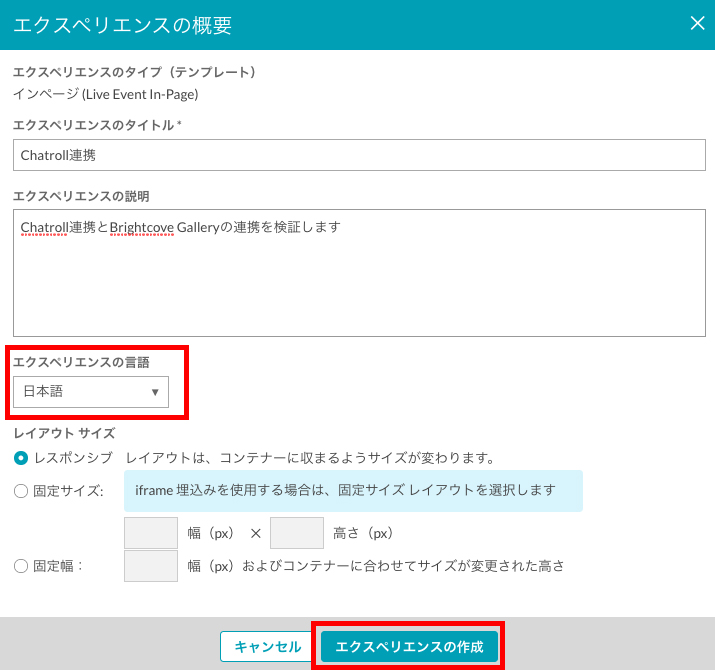
Please enter the “Experience Title” and “Experience Description”, etc., and set the “Experience Language” to Japanese. After completing the settings, please click “Create Experience”. (You can change these settings later.)
In this example, we will set it so that the Chatrol chat screen set in the first part is displayed on the right side of the video player where the live video is being streamed. If you click on the “+” button displayed on the right, a screen called “Select Component” will appear, so please click on “Chat”.
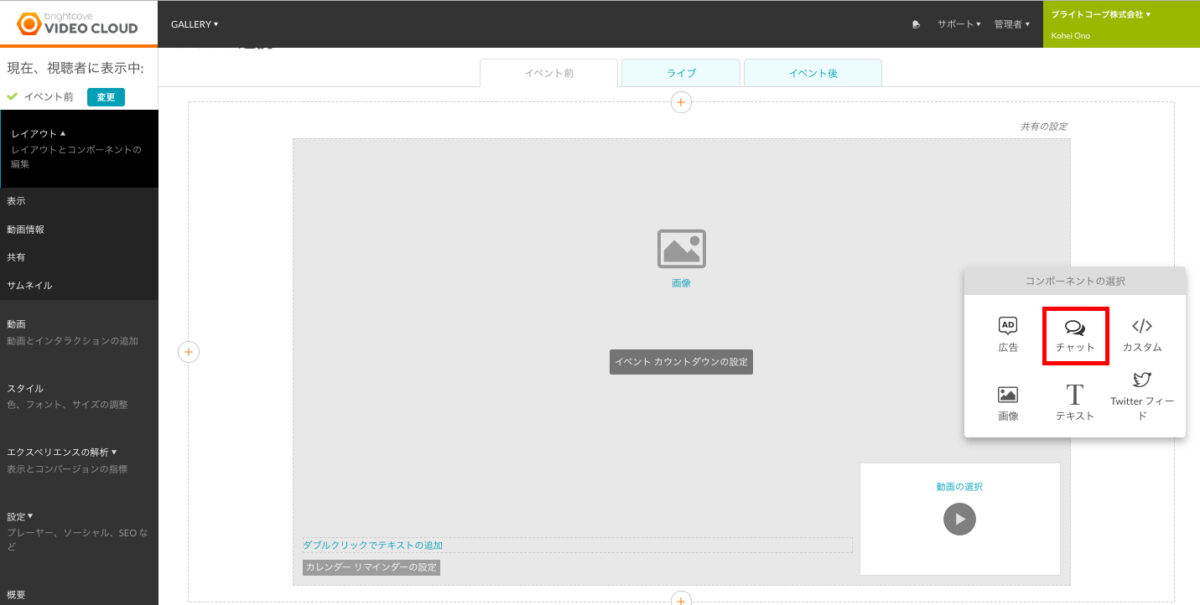
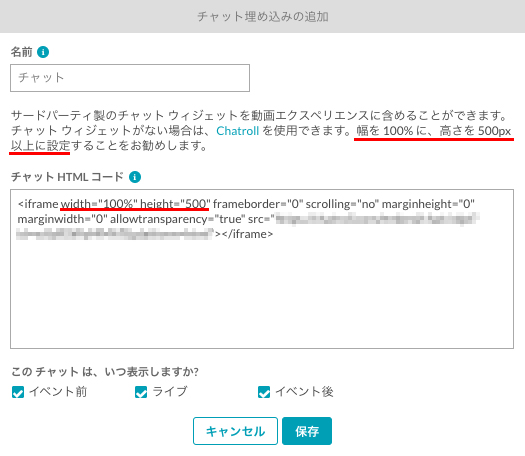
Then, the following pop-up will appear. Please enter the Chatroll embedding tag (iframe tag) in the “Chat HTML code” section. We recommend changing the “width” (width) to 100% and the “height” (height) to 500px at this time.
In this example, we will set the chat window to be displayed from before the live event to after the event. Please check all of the boxes displayed below “When do you want this chat to be displayed?”, “Before the event”, “Live”, and “After the event”, and then click the save button.
If you click on “Preview” in the top right after the transition, the chat screen you set in the previous section will be displayed as follows. (In the following, the “play status” displayed in the top right of the preview is set to “Live”.

## 3. How to set the Video ID
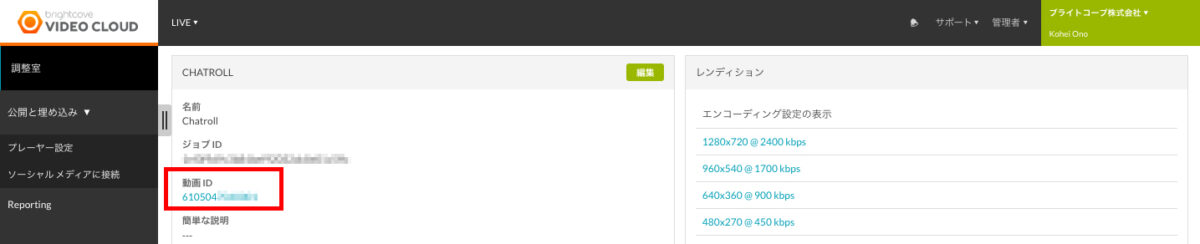
Next, we will explain how to obtain the Video ID for the video you want to broadcast live.
In this article, we will not be covering the method of live streaming (how to create a live event) itself. For more details, please check [here](https://ja.live.support.brightcove.com/live-module/creating-and-managing-live-events-using-live-module.html “here”). After creating an event with the Live module, please copy the “Video ID” displayed in the “Control Room” of the event.
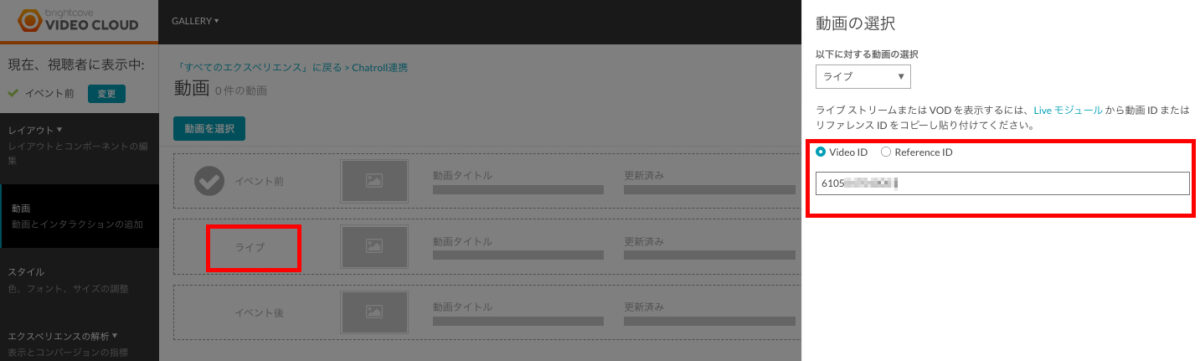
After copying, go back to the Gallery module and click on the “Video” tab on the left. After clicking, you will see “Before Event”, “Live”, and “After Event” displayed, so click on “Live”. Then, on the right, a screen called “Select Video” will be displayed, so make sure that the “Video ID” radio button is selected and paste in the video ID you copied earlier.
## 4. Reflecting the settings
Finally, to apply the settings you have made in Gallery, click on “Publish and Embed” in the top right of the Gallery module, and the following screen will pop up.
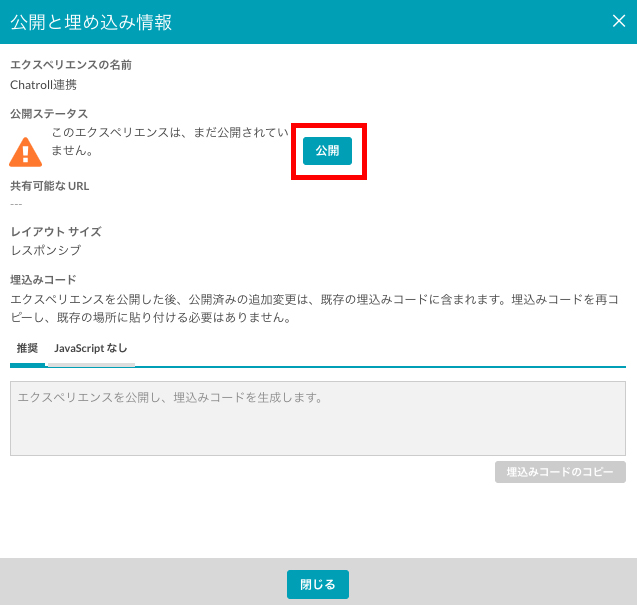
After a short while, the “Public status” will display “This experience is up to date. Please install the JavaScript displayed under ‘Recommended’ on your website. Then, the video player should not display as shown below, and only the chat window should display on the right.
This is not a bug, but is because the settings in the Gallery module are set to the state before the live broadcast starts (before the event). After confirming that the live broadcast has started on the Live module, click on “Change” next to “Before the event” in the top left of the Gallery module, and the “Change what viewers see” pop-up will appear. After selecting the “Live” radio button, click on “Continue”.

All settings are now complete. The video player for the live stream should now be displayed on your website, with the chat window appearing on the right-hand side. As in the previous section, please enter the guest name (in this case, we have entered ‘Brightcove Guest’) in the ‘Guest’ field of the chat window and sign in.
You can now enter your chat messages while watching the live stream as shown below.
In this case, we have used Chatroll and Brightcove Gallery to enable chat during live streaming. In addition to this, there are also other ways to implement chat and surveys, such as using <a href=“https://sendbird.com/” target=“_blank” title=“Sendbird”>Sendbird</a> in the US and <a href=“https://pigeonholelive.com/” target=“_blank” title=“Pigeonhole”>Pigeonhole</a> in Singapore. Please feel free to use these services according to your company’s needs.


