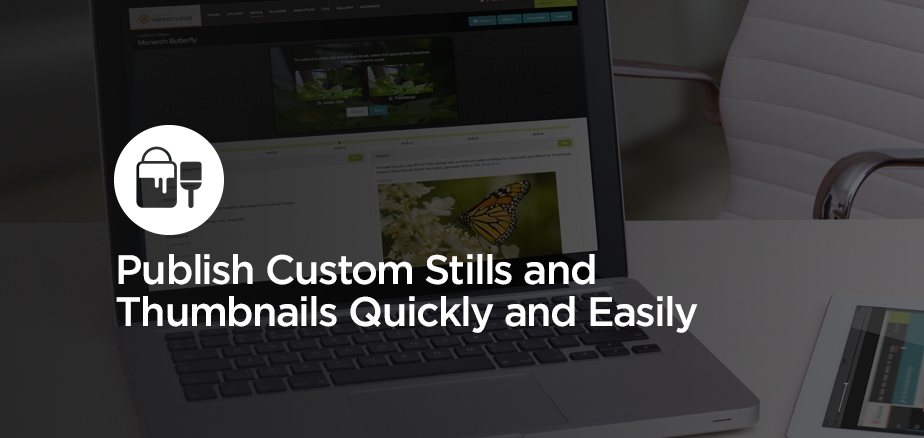
HOW TO PUBLISH CUSTOM STILLS AND VIDEO THUMBNAILS QUICKLY AND EASILY

Thumbnail images are an important visual draw for people to watch your video content. As such, the image choice can have a huge effect on the success of your videos. Brightcove offers two ways to create custom still and thumbnail images: one is quick and easy and the other allows you to create a custom image using a graphic design application.

Having a quick and easy image option that you can adjust at a later date is necessary for many enterprise video use cases. Let’s say you’re streaming a live event or publishing videos that are time sensitive. Maybe it’s a news story or product announcement. You’re probably familiar with the tug-of-war between getting content live quickly and making sure it looks right. Let me show you a good way to effectively manage both these needs.

Quick Thumbnails

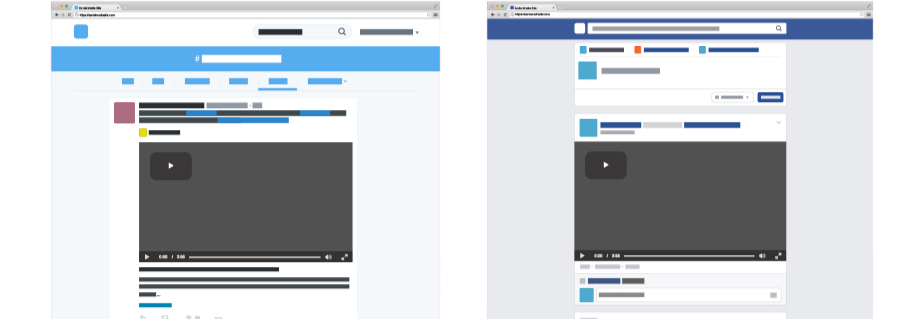
When you upload your video to Brightcove, the system automatically grabs the frame at the 50% mark. This frame may or may not be what you want. If it’s not the frame you want, you can play your video and pause it on a more appealing frame. Click “Capture” to quickly save this as your new thumbnail image. Now you’re able to immediately go live with an acceptable image.

Customer Thumbnails

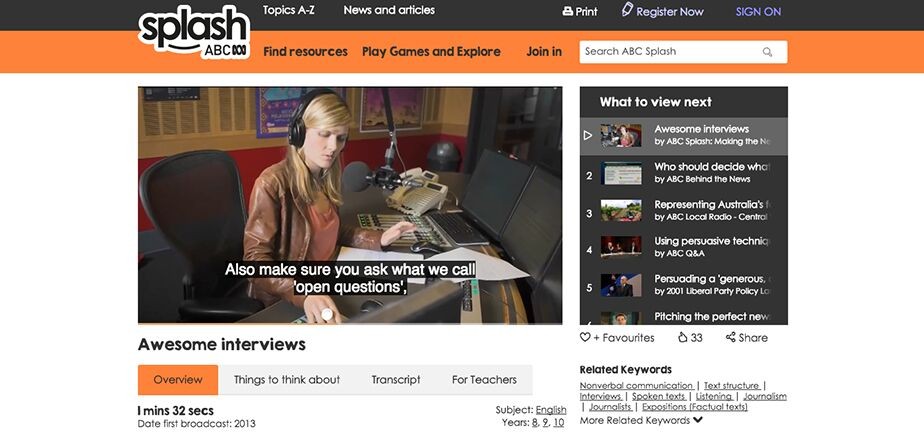
Ultimately, you want your video to have a polished, premium, and click-worthy still image. This may require grabbing a still image, color correcting it, and adding some graphics. This all takes time. Since you already grabbed a still image from the video using the quick method above, you have a little extra time to create your beautifully crafted custom image by using your graphics application of choice. When you’re done, simply click the “Edit” Button in the still image section of your video in the Media Module and upload your image.

Here’s the real magic: Your new image will be processed and automatically become the video thumbnail. No need to re-publish.

This hybrid approach of capturing a frame within Brightcove and later uploading a custom image allows you to publish quickly, gives you time to craft your custom image, and lets you simply upload that perfect image when it’s ready.

VIDEO SEO: 3 ON-PAGE TACTICS AND HOW TO AUTOMATE THEM

SEO is more than simply doing keyword research and selecting the most relevant keywords for your content. It’s about giving search engines what they want in the format they want. If you can provide the right information, in the right format, then your content has a better chance of ranking.

The good news for those in video marketing is that search engines love video pages because people love video pages.

Video content offers an added opportunity to provide search engines with the specific information they’re looking for. While there’s no way to ensure your videos show up first in search results, there are some proven strategies that can increase your click-through rate.

To have a successful video SEO strategy, you need three main things:

  • Unique URLs for each video on your site domain
  • Schema tags for each video on your page
  • A video sitemap

1. Unique URLs

A single unique URL means you can share the unique URL via sitemaps, emails, or social media networks. That allows the search engine to follow and track that URL and to determine its value. Essentially, you’ve given your video its own address so search engines can track it no matter where it appears.

Creating unique URLs can be challenging as it requires you to re-structure how your webpages are named and built. This step can be troublesome as you’re probably not the only person or division with your company that uses your website.

2. Schema Tags

Some time ago, the major search engines agreed upon a standard set of tags, called schema, that you can use to describe the videos on your webpage. These are tags that you add to the code of your page in a specific format. This step allows the search engines to gather data from your website in a predictable and structured format (simply known as structured data).

We have a great tool that will pull metadata from your Brightcove account and add it as schema tags for you. However, this means that you’ll have to do this for each new video you embed on your site and re-do it for any existing videos.

3. Video Sitemaps

You can compile a list of your videos with their unique URLs and submit them as a sitemap to Google and other search engines. This action will trigger their bots to crawl your website and confirm that your videos are indeed on that page. If they happen to find schema tags on those pages, they’ll collect those additional details as well.

Once created, the next step is to submit the sitemap to Google. The challenge is as soon as you post a new video, you’re going to need to update and re-submit your doc to Google.

How to Automate Video SEO

Now that you understand the importance of unique URLs, schema tags, and sitemaps, the question is: How do you implement and maintain them (especially at scale)? Honestly, if you do this on your own, it’s going to take some work, but it will be worth it. Or you could simply let Brightcove Gallery manage all three of them for you.

Not only can you host and publish video portals, but any Brightcove Gallery site will automatically compile the video titles, video descriptions, and other metadata into a video sitemap and keep it up to date. It will also automatically embed schema tags on each page and give each video a unique URL without interfering with your corporate website. Many publishers report measurable improvement in their video discoverability after launching a Gallery page.

Whether you take a DIY approach or leverage Brightcove Gallery, unique URLs, schema tags, and sitemaps will help you optimize your videos and keep your brand in front of viewers when using the major search engines.

HOW TO CREATE VIDEO MARKETING CONTENT FOR SOCIAL MEDIA

Social media and the effective use of video on these platforms present an unparalleled opportunity for marketers to increase reach and brand awareness. These channels are essential components of a well-designed video marketing strategy. However, many marketers ask how to align social media videos with content hosted on their own platforms. Below, I’ll share tips on creating social media video content that complements your main videos and drives users back to your website.

Think of social media as a marketing “fishing net.” The wider you cast it, the bigger your potential audience. Establish a presence on the social platforms where your prospects spend time. Ultimately, though, the goal is to funnel traffic back to your website, where you can control the user experience, access better analytics, convert prospects into customers, and foster long-term loyalty.

Social media demands a different style of video content—short snippets, partial stories, or live event highlights—that grabs attention and encourages viewers to visit your site for more. Consider these videos as trailers that complement your primary content. Creating social media video content is less daunting than it may seem and should support your broader video marketing activities rather than being treated as a standalone task.

HOW TO CREATE SOCIAL MEDIA CONTENT EFFECTIVELY

I’ve experienced the challenges of creating additional video content firsthand. Initially, I hesitated to produce social media videos because my primary content was time-consuming and costly. However, upon closer inspection, I realized the extra effort was minimal, and I discovered some tricks to simplify the process. Ultimately, social media content proved to be an invaluable tool for driving traffic to my website.

Here’s the most important lesson: Plan for social media content from the start. Before you begin shooting or even writing a script, decide what your supplementary videos will look like. Once you’ve set up cameras, lights, and actors, it takes very little additional effort to shoot versions tailored for social media. Often, marketers think about social media marketing after the fact, leading to rushed, less effective content. A bit of forethought can save you significant time and effort later.

TIPS FOR CREATING SOCIAL MEDIA VIDEOS


1. EDIT TRAILERS OF EXISTING VIDEOS

Editing a trailer or a shorter version of a video is easier than you might think. Most of the work is already done, and an editor can quickly produce a condensed version alongside the original.

2. CAPTURE BEHIND-THE-SCENES FOOTAGE

Behind-the-scenes content—like bloopers, outtakes, equipment shots, or partial scenes—can make for engaging social media videos. These clips pique interest and encourage viewers to check out the final product.

3. LEVERAGE LIVE EVENT STREAMS

Live events provide excellent opportunities to create social media content. With tools like the Brightcove Live module, you can mark edit points in the long-form video, save shorter clips directly to your Video Cloud account, and post them to platforms like YouTube, Facebook, or Twitter. During the event, take notes on interesting moments in the live stream to quickly create impactful social media content afterward.

4. PLAN AHEAD

The key to all these strategies is preparation. Video production professionals know that investing time in pre-production prevents problems later, saving effort in post-production. The same principle applies to social media marketing. A little planning ensures you can effortlessly create and distribute engaging content that aligns with your business goals.

By planning your social media strategy in advance, you can efficiently produce high-quality, shareable videos that drive traffic to your website, enhance your brand’s online presence, and ultimately support your broader marketing objectives.

Calculating the ROI of interactive videos

Despite the surprisingly high evaluation of marketers regarding the effectiveness and satisfaction of interactive videos, marketers still cannot give a clear answer to the simple question of “what is the ROI of interactive videos?”.

AUSTRALIAN BROADCASTING PROMOTES ACCESSIBLE E-LEARNING

The internet has become a global educational boon, offering students and teachers unparalleled access to resources worldwide. Gone are the days of relying solely on outdated textbooks or browsing through school catalogs. Instead, millions of online resources are now available, bridging the gap between those with extensive access to educational tools and those who have traditionally been underserved. This progress is particularly significant for individuals with visual and hearing impairments, a group often overlooked by educational initiatives. In Australia alone, approximately 4,000 blind and partially sighted children benefit from these advancements (according to Media Access Australia).

Online video is playing a pivotal role in improving access to educational resources for these students. A prime example is ABC Splash, a free digital educational platform from the Australian Broadcasting Corporation (ABC). ABC Splash provides educational content for students of all levels and abilities, featuring a mix of online articles, podcasts, and, most notably, interactive online videos. With around 2,500 videos available and new content added daily, the platform offers an engaging and visual way to learn.

What sets ABC Splash apart is its commitment to accessibility. The platform features advanced access tools that cater specifically to users with visual and hearing impairments. Brightcove has a long-standing partnership with ABC and now works closely with its education division to enhance the accessibility of ABC Splash. Through Brightcove, users can access videos with features such as closed captions, transcripts, keyboard controls, and screen reader support. Additionally, the entire site adheres to accessibility standards, ensuring that more users than ever can benefit from its content.

Brightcove’s Dynamic Ingest technology enabled the rapid ingestion of ABC’s entire video library, ensuring that all content was ready in time for the platform’s launch. This included optimizing workflows to accommodate both geographically restricted and unrestricted content within the same account and integrating with ABC’s content management system (CMS).

ABC Splash exemplifies how Australian content providers are leveraging advanced technology to reach broader audiences and promote accessibility, particularly for marginalized groups. This initiative is a groundbreaking example of how online video can provide barrier-free access to educational resources for an ever-expanding audience. Brightcove is proud to support ABC Splash in this important project, which makes learning more inclusive and accessible for all.

STREAMING HARVARD BUSINESS SCHOOL’S LIVE EVENT

Brightcove recently participated in a panel discussion at Harvard Business School (HBS) titled “TV, Disrupted: A World of Video Choices Opens Up.” The event explored the challenges broadcasters, advertisers, and media companies face due to the rise of OTT offerings and emerging business models, which are reshaping traditional relationships between consumers and operators. The discussion was moderated by industry expert and HBS graduate Will Richmond, editor and publisher of Videonuze.

With Brightcove’s VP of Business Development and Marketing, Mike Green, on the panel, and HBS being close to our headquarters, we saw it as a great opportunity to live stream the event using Brightcove’s live streaming feature. Brightcove has experience live streaming events like DrupalCons and our customer conference, PLAY, so we were well-prepared to make it happen.

PLANNING FOR SUCCESS

As Brightcove’s Video Production Manager, I oversee all video production efforts, from planning and creation to editing and execution. For live events, preparation is key. A well-planned framework makes the execution smoother and the final product better. Here are the key questions I ask before any live event:

  • What is the program about?
  • How many speakers are there?
  • How long will the event last?
  • Will other media be used (e.g., PowerPoint, videos)?
  • What audio/video equipment is available on-site?
  • What are the IT capabilities in the venue?

After coordinating with Mike Green and the HBS event team, I had all the information I needed to plan the equipment, personnel, and content strategy. For this event, we handled the live stream production in-house rather than outsourcing to a production company, thanks to thorough preparation.

KEY COMPONENTS OF LIVE STREAMS

RECORDING

We used two cameras for the event. I operated Camera A, which provided a fixed wide shot of the stage, while my colleague handled Camera B for close-ups of the speakers. This setup allowed flexibility, with Camera A as a fallback if I needed to assist with other aspects of the production.

LIGHTING

We opted not to bring additional lighting equipment, as Spangler Auditorium at HBS was already equipped with excellent lighting and sound systems, which were sufficient for our needs.

SOUND

The auditorium’s on-site sound system provided a feed directly to Camera A, which we used to deliver high-quality audio to the live stream. This eliminated the need for an additional sound engineer.

VIDEO CONTENT

Carl Rutman, one of our talented Solutions Engineers, managed the live stream using Telestream’s Wirecast software. Wirecast, a partner of Brightcove, integrates seamlessly with Brightcove Live and allowed us to combine video sources, including:

  • Two cameras
  • A PowerPoint presentation
  • A short video played by one of the presenters

Rutman ensured a smooth broadcast by switching between these sources in real-time.

THE LIVE STREAM

To initiate the live stream, Rutman created an event profile in Brightcove Live and embedded the required URLs into Wirecast. HBS was provided with an embed code ahead of time, enabling the event to be hosted on their website. Once everything was set, Rutman started the stream using Wirecast, coordinating the broadcast with the on-site activities.

EQUIPMENT

  • Cameras: 2 Canon C100s with 24-70mm and 70-200mm zoom lenses
  • Cables: HDMI and HD-SDI cables
  • Converters: 2 Atomos H2S HDMI-to-HD-SDI converters
  • Recorders: 2 Blackmagic UltraStudio Mini Recorders
  • Software: Telestream Wirecast on a laptop

LIVE STREAM CONFIGURATION

The configuration connected the cameras, sound system, and video content through Wirecast, allowing seamless transitions and delivery to the live audience.

DEMYSTIFYING LIVE STREAMING

There is a common misconception that live streaming is too complex or expensive. Many companies assume their events aren’t “important enough” to justify the cost or effort. However, live streaming can be simple and cost-effective. All you need is a camera, a microphone, and a computer to get started.

Live streaming doesn’t require a high-profile venue, an elaborate setup, or a celebrity keynote speaker. Whether it’s a Q&A session, corporate communications, or an educational panel, the right mix of motivation, preparation, and equipment can make your event a success. At Brightcove, we’re here to help you create meaningful live experiences that engage audiences in real time.

VIDEO SCHEDULING: 4 EXAMPLES FOR ON-DEMAND CONTENT

Scheduling videos allows marketers to set and forget video series release dates and ensure videos publish at a specific time. For publishers, this function streamlines workflows. For viewers, it ensures expected videos appear on time. This capability creates a consistent and reliable experience that enhances brand perception.

Brightcove’s video platform has a helpful feature that lets you set sunrise and sunset dates on your videos. Below are four examples of different ways you can use this in your everyday workflow.

1. Long-form Video Content Cut Down into Series of Short Clips

A great video marketing and content strategy is to break up a long-form video into segments or to edit it into shorter highlights. By creating shorter clips, you have a series of related videos you’re able to release on a cadenced basis over a few weeks.

For example a longer live event could yield several shortened videos delivered on demand. This allows you to stay in touch with your viewers after the event as well as offer them valuable content to promote the next event. If you’ve integrated your video platform with your marketing automation platform (MAP), you’ll be able to use the video metrics to create targeted follow-ups.

2. Time-sensitive Content

Content such as press releases, internal company announcements, and third-party licensed content are time sensitive. They need to go live on a specific day at a specific time. You can remove much of the stress by simply setting your go-live and end-of-life dates.

3. Multiple Time Zone Content Releases

If you serve a global audience, you may have a video go-live time that isn’t convenient for you in your time zone.

For example, you might be in Boston and your video needs to go live at 9AM in London, which would be 3AM for you. Instead of waking up and pushing out a video in the wee hours of the morning, you can simply schedule it and it will go live automatically at the preset time.

4. Video that Needs to “Go-live” as Part of a Campaign

Campaigns take a lot of planning. Whether it’s for a product release, an upcoming conference, or special offers, you’ll want to plan ahead and produce video for each phase of your campaign. You can shoot and edit in bulk, then schedule your video go-live dates and times. You can even swap versions out by scheduling video 1 to be pulled offline at the same time video 2 goes live.

By highlighting this feature and showing you how others have used it, we hope you’ll be inspired to investigate how you can make your video publishing a little easier to manage.

HOW TO AVOID BLACK BARS AROUND YOUR VIDEO

We’ve all seen it on other people’s websites: a beautifully produced video, embedded on a page. But why are there little black bars either on the top and bottom or on the two sides? Nothing screams, “I don’t know what I’m doing,” like seeing black bars around your video—not to mention the huge waste of real estate.

Why Videos Have Black Bars

The reason you get black bars is because your player and your video are not the same aspect ratio.

Most video today is shot in High Definition (HD). HD footage uses a 16:9 aspect ratio (also known as “widescreen”), and it includes resolutions like 4K, 1080, and 720. That 16:9 ratio means that for every 16 pixels in width, there are 9 pixels in height. Before the HD revolution, we shot video in Standard Definition (SD), which used a 4:3 aspect ratio. In this case, every 4 pixels that your video is wide, it’s 3 pixels tall.

If you play a 4:3 SD video in a 16:9 player, you’re going to have black bars on the sides. In fact, if your player and video are even one pixel off in either the height or width, you’ll see black bars around your video.

How to Fix Videos with Black Bars

The complex problem of pixels and ratios is actually very easy to solve. If you’re watching a video that has black bars around it, all you need to do is adjust the player size to match the aspect ratio of the video.

We’ve provided an aspect ratio spreadsheet that does the computational work for you. Simply enter either the height or width of your video, and it will tell you what the other dimension should be in order to maintain a 16:9 aspect ratio. That translates into no black bars.

If your video player isn’t responsive, which means it automatically resizes for the device it’s playing on, you’ll need to enter the exact size from the calculator spreadsheet. Note: Smart players need to be configured to be responsive. The Brightcove Player is automatically responsive, but it can be set it to a fixed height and width if desired.

Setting your player aspect ratio is as easy as that. When you have your player sized correctly, you won’t see anymore black bars. This should help you keep your videos looking professional once they’ve been published to your website or anywhere else.