7 Types of Videos for Employee Training and Onboarding


Onboarding new employees and integrating them into the company culture and workflow is a shared challenge of HR personnel and managers. Beyond, retention, companies want employees to perform better and faster. From an operational standpoint, this means saving time and resources getting employees to feel confident in their new roles and taking ownership within the first 90 days.

Video is at the center of a new age of employee productivity and innovation. Video training is the first crucial step.

Benefits of Onboarding Employees through Video

Onboarding aims to communicate important information about the company’s values and culture. But it often subjects new hires to classroom-style lectures and sends them home with documentation to read. So, what does that say about the company? It’s boring? Unimaginative? We can’t imagine you’d ever settle for your company being described with these attributes. Consider the benefits of using video for employee onboarding and training.

  • Fosters an emotional connection, welcoming new hires
  • Introduces the culture of the company
  • Builds trust and rapport with executives
  • Maintains consistent company messaging
  • Communicates product features or service benefits clearly
  • Enables self-paced learning
  • Creates reusable and repurposable video resources
  • Lowers on-site training costs

Effective Video Types for Corporate Training

Video as a key component of the onboarding process adds personality to communication and associates a visual connection to information sharing. To improve engagement with new employees, consider creating the following types of video.

  • 1. Company overview/leadership welcome. The CEO presents a summary of the company’s mission and business objectives.
  • 2. Company about us. Why does the company matter? Create a video about the company’s history, beliefs, culture, activities in the community and overall purpose to inspire employees.
  • 3. Job description. Detail the core responsibilities of the position, organizational support they’ll receive, and how their goals will be measured and performance ranked.
  • 4. Department overview by management. Summarize the roles and goals of a team or department. Align the team with a common vision through video.
  • 5. Video employee directory. Introduce yourself. Each new hire should create a video introduction. Insert these videos into org charts. Add searchable meta tags, so new employees can easily connect through common interests.
  • 6. IT policies and procedures. Record standard training and educational content for an IT resource center. Simple how-to videos can show new employees how to conduct video conference calls, add email signatures or order business cards.
  • 7. Employee-generated content. “Day in the life” segments featuring employees provide a meaningful way to educate new employees on roles, responsibilities, and dynamics. Consider creating a montage featuring a series of these types of segments into one video that shows how teams operate and inter-connect. This kind of information can, otherwise, take months for a new employee to learn.

To get started, determine which points of the onboarding process employees seem to require more guidance. Even better, survey current employees to determine at which stages they felt lost. From there, look to your onboarding documentation to guide the process of chaptering your video content, as well as a source of video scripts.

While a video onboarding program may seem unwieldy, your teams already have all the information to make you (and your workforce) successful.

VIDEO MARKETING ACROSS THE CUSTOMER JOURNEY

We’ve culled advice from some of the top video professionals in the industry about how they use video. Not surprising, following the customer journey is central to this process.

Driving Brand Awareness with Video

Bill Marriot: We use video to help humanize our software but we do that in many different ways. And our job as the people who own video and new media, we are responsible for targeting that path and having the right type of video for every stage along that customer journey.

Emma Cheetham: So at the top of the funnel, we may be doing a brand awareness piece. We may be doing a product launch and putting teasers out about products that are new to market, new features, new technology.

Holden Comeau: Video is really a natural fit when we’re thinking about what really is happening around an endurance sporting event. The event is really an experience. They’re trying to create an entertaining experience. They’re trying to really connect.

Techniques to Solicit Video Engagement

Neil Rice: Look, when we build these video assets we are going to create a long-tail description that is value-prop, like it’s an article, but it’s really more an extended post. And so what it does is it allows from, an engagement standpoint, I don’t have to hit play yet because some audiences are a little shy of hitting the play button. So you give them this very valued description, which only can be garnered from writers, and then they can go, “Oh, I want to watch this.”

Emma Cheetham: So we also have video content on a lot of our propositions, so how the delivery will work, how a manufacturer warranty works, things like if you are ordering a huge appliance like a big American fridge/freezer, we will provide a piece of video content about what to consider regarding the delivery.

Learning from Video Analytics

Kyle Morton: Once we understand the goal what we really try to do is get people to not think about video anymore and say, “If that content that was in the video was a microsite or a web page what would you do to track it? What would you do to try to convert somebody or try to get feedback from them?”

Neil Rice: Somebody came, they went to that particular page, that particular URL result, what did they do? Did they leave the site on average—too fast? Did they not click through to other pages? Was the bounce rate high? If all three were bad then you have to fix that.

Emma Cheetham: So we now chunk the content down into 60-second animations or shorter. And we’re noticing that the people are engaging up to 85% through that video, as opposed to a lot lower on the longer chunks. And also, customers that are consuming a one-minute piece of video are converting up to 10% higher than ones that have viewed the longer pieces.

Building Retention and Advocacy with Personalized Video

Emma Cheetham: We also use sections of video as part of the CRM program as well, so right the way into and through the journey. If you have just bought an electrical good from us, we will follow up with an email saying, “Hey, were you aware that this appliance offers this feature?” And make sure that we’re still continuing to look after the customer, even after they purchased.

Holden Comeau: When they see an immersive video gallery experience with all this great content, they get a sense of what the experience of that event is all about. That really goes a long way in attracting new customers and retaining existing customers.

Bill Marriot: There’s a growing audience of people who really want to understand how your product touches their life. If you don’t engage them, if you don’t capture their heart and soul, and if they don’t care about your company you never get to really sell them the product.

USING VIDEO CAMPAIGNS FOR CUSTOMER RETENTION AND UPSELL

Brightcove’s customer base includes thousands of companies and thousands of contacts within those companies. Our challenge, like many companies, was this: How can we humanize our interactions with customers to connect and get a response? Regular html or plain text email is impersonal while periodic check-in phone calls rarely connect or are hard to scale. Luckily, we approach our challenges with a video-first mentality.

Why Video Works for Customer Retention

As companies try to improve customer loyalty and retention, a very basic element is often overlooked: the human element. In a day and age when predictive marketing and marketing automation are all the rage, it’s important to remember we are marketing to people, not Eloqua IDs or Salesforce contact records with high lead scores. Let’s build relationships.

Brightcove maintains high retention rates and we want to protect this relationship while potentially growing opportunities for expansion within an account. This is why our account managers (AMs) are so important. It became clear they would be the stars of our first video communications to our customers.

Why Customer Marketing?

In 2016, 32% of C-level executives ranked retaining an existing customer base as a strategic priority, second only to initiatives focused on growing their customer base (42%). With account-based marketing (ABM) and customer marketing, we try to conquer both. Maybe one division of a $5B company is using Brightcove for marketing purposes, but the HR team or training group has an internal communications or live streaming use case that we can also address. Customer marketing helps expose those opportunities for additional use cases.

How We Created Our Customer Video Campaign

Here is our strategy, step by step.

  • 1. Shot individual videos of our account managers introducing themselves and explaining their role at Brightcove and why they enjoy it. The videos came across as authentic and unrehearsed. This builds a personal connection. Our videos expressed personality, energy, and a unique voice.

  • 2. Crafted very short text emails, 5-7 sentences, with a thumbnail of the AM’s video. The emails were sent as if coming from the AM themselves and were personalized accordingly.

  • 3. Led the recipient (upon email click-through) to a landing page containing the introduction video. The page also contained some fun facts about the account manager, like first concert, spirit animal, and favorite Brightcove video.

Brightcove Account Manager Video Retention Campaign

  • 4. Recorded data through our Eloqua integration which enables us to capture who watched the video for how long and how many times.

  • 5. Set Salesforce alerts to “close the loop” on video. Account Managers could see which contact watched which video for how long and follow-up appropriately.

Video Analytics for Customer Engagement

Customer Marketing Video Campaign Results

 
Unique Open Rate26.72%
Total Video Views483
Unique CTR6.35%
Click-to-Open Rate24%
Open to View Rate29.34%
Avg Video Engagement82.84%


Customer Marketing Campaign Summary

Even the qualitative feedback was encouraging. Responses ranged from the friendly (“so good to see and hear who you are”) to the more business driven and immediately actionable (“let’s set up a meeting”). Currently, dozens of meetings have been arranged. The best part is that many of the responses and meetings are with new contacts in the account, achieving our goal of visibility within additional business units of a customer account.

These videos brought new people into conversations with Brightcove. In addition to our main contact, we now are engaged with the marketing automation team, the internal communication team, the training team, etc. We led with a human element, utilizing video for engagement. Video brought our collaborative culture to life, and presented our AMs as knowledgeable, helpful people here to make customer video initiatives successful.

Key Content Takeaways

  • Humanize your content. You can automate a message, but use people to deliver it.

  • Consider length. Keep your videos short: one-minute maximum.

  • Edit for brevity. To ensure click-throughs, don’t drown the video thumbnail in text.

  • Build relationships. Use this kind of video to make personal connections, not hawk a product. As this campaign demonstrated, the sales opportunities will follow.

Getting started with video for customer marketing is easier than it looks. Define your objective, hone the message, record one video, and test it.

BRIGHTCOVE PRODUCT UPDATES: VIDEO CLOUD STUDIO

Since announcing the new Video Cloud Studio in 2015, we’ve introduced numerous features, functions, and improvements. Many customers who have already switched to the new user interface have provided positive feedback. We understand that change can be challenging, so we’ve worked to make the transition as seamless as possible.

To help with the switch, we’ve created a migration guide and FAQ to address any questions you may have about moving to the new Video Cloud Studio. You can also reach out to your account manager or our support team for assistance. For existing customers, it’s worth noting that the new Video Cloud Studio operates as a separate interface from the old Studio, allowing you to easily switch between the two. When you log into the new Studio, all your existing videos and account settings will be available. Any changes you make to video metadata or new videos you upload will be reflected in both interfaces.

As a Video Cloud user, you can start using the new Studio today. It’s faster and more user-friendly than ever, featuring an all-new mobile-friendly interface built on the latest API versions. With enhanced features and functionality, the new Studio streamlines workflows, helping you get your video content to viewers even more efficiently.

HIGH-QUALITY VIDEO EXPERIENCES

When uploading videos through the new Studio, you can choose from our standard capture profiles or create custom capture profiles tailored to your content type. This ensures the highest quality video playback for your viewers when publishing videos using the new Brightcove Player.

MOBILE ACCESS

We know many of our customers are on the move, so we’ve optimized the new Studio for tablets and smartphones in addition to desktop computers. You can now upload videos, edit metadata, view analytics, and even capture embed codes for players directly from your mobile device.

PERFORMANCE AND EASE OF USE

The new Media module dramatically improves performance, enabling thousands of videos to load in seconds. This means you’ll spend less time searching for content and more time publishing. The new flexible folder feature in the Media module makes it easy to organize your content into related groups, whether by categories, web properties, or distribution channels—whatever works best for you! The streamlined navigation ensures you’re just two clicks away from copying an embed code for your player with the assigned content.

CUSTOM ANALYTICS

The Analytics module now includes an exciting new feature: the Custom Report Builder. This tool allows you to create tailored reports, pull data from multiple Video Cloud accounts, filter reports by tags, and schedule automatic report delivery to team members on a daily, weekly, or monthly basis.

CONTROL AND SECURITY

We’ve added new user roles for the Upload and Analytics modules. Upload-only access enables users to upload videos without the ability to edit, delete, or publish existing content. The Analytics user role allows designated users to access only the Analytics module for viewing and running reports, providing greater control and security for your account.

VIDEO MARKETING TIPS FROM THE DETROIT SYMPHONY ORCHESTRA


How does a marketer for a brand that is neither a big company nor in a tech-related field increase accessibility/awareness, engagement, and conversion in an increasingly digital marketplace? What types of programs and campaigns can a marketer institute to increase revenue flow for a company recovering from a financial downturn? Detroit Symphony Orchestra’s DSO Replay program did just that, and recently received both Best Self-Hosted Online Video Campaign and Best Entertainment Online Video Campaign awards from Onlinevideo.net.

Background

The internationally-acclaimed Detroit Symphony Orchestra (DSO) is the fourth oldest orchestra in the United States. In 2010, the combination of Detroit’s economic downturn and institutional challenges resulted in a work stoppage during its 2010-11 season.

DSO was faced with some clear challenges: their team is small, and almost everything they do in the digital media group is grant based. The lack of employee and financial resources led the team to get creative and think outside the performance hall to survive and expand.

Rather than concentrate on their challenges, they looked to their core content strengths to move forward: their artistic quality, a long heritage, and a very large video archive of performances. Their strategy was straightforward—utilize their library of archived webcasts to drive donor donations.

With that goal in mind, they first launched Live From Orchestra Hall to webcast performances on a live basis, and then used Brightcove technologies to launch their video on demand program DSO Replay in August 2015. DSO Replay uses the archived footage to inspire giving.

As a benefit for giving just $50 to the annual fund, donors are able to access and enjoy DSO Replay all year long. DSO provides a free, two-minute Replay experience to new site visitors, and suggests an annual donation as a way to receive DSO Replay all year at no additional cost.

Thanks to its integrated approach of live, on-demand, and revenue-producing video, DSO is able to describe itself as “the most accessible orchestra on the planet,” increasing access to its rich performance library and providing a quality symphony experience to as many people as possible. In doing this, it has increased the donor base and provided much-needed revenue for furthering performances and programs.

So what can marketers learn from DSO’s award-winning video programs?

1. Go Live for Accessibility and Bottom Line Impact

DSO now presents live webcasts to more than 300,000 virtual concert attendees per year through its Live From Orchestra Hall program. As a nonprofit institution, the DSO relies heavily on Annual Fund donation support. Since the orchestra’s return to the stage in 2011 following a labor stoppage, the DSO has sought to revive itself as a leader in digital accessibility, and now presents more than 25 live webcasts annually.

2. Create VOD from Live Webcasts to Further Drive Revenue

DSO uses its on-demand video platform as an attractive incentive for patrons to contribute to the orchestra’s fundraising efforts. Since DSO Replay launched on Brightcove Gallery, DSO has achieved a new level of accessibility that has driven more than 500 new annual fund patrons—an increase of 10%—and a sharp increase in donations since its launch.

3. Re-engage Your Base and Gain New Customers

DSO has received more than 500 new gifts of $50 or more, more than 50% from new donors, 15% from lapsed donors who became reconnected due to DSO Replay, and a new audience located both out of state and internationally.

Adding these three tactics into your strategies can yield impressive results. While DSO needed to meet revenue goals, the donations received were needed to support the ultimate separate goal of reaching more viewers. DSO has exceeded its initial goals of reaching 100,000 live and on-demand viewers per season. Overall, they have reached more than one million viewers since 2011. Live From Orchestra Hall and Replay together more than double the size of the concert hall audience, and attract viewers and listeners locally and internationally. The Orchestra has now presented more than 120 webcasts across five seasons, and is one of two Orchestras in the world to webcast on a regular basis.

Marketers in all types of business—non-profit, SMB, enterprise, and the arts—are trying to grow awareness for new customers, increase engagement with their existing customers, and drive conversion. DSO’s award-winning strategies demonstrate how even resource-strapped small teams can make a big difference when they add video to their marketing mix.

LESSONS FROM LIVE STREAMING A SOLAR ECLIPSE

Exploratorium’s Total Solar Eclipse

Not too long ago, we had the opportunity to sit down with Rob Rothfarb, Project Director of the Online Media Group at the Exploratorium in San Francisco. Rob shared with us the Exploratorium’s educational mission, and how through both a multi-pronged content awareness strategy and multiple layers of video technology and testing, that vision became a reality. Across the world and devices (which included an app complete with live video stream), a whole new audience was exposed to a rare total solar eclipse.

Read our interview below for inspiration for your next event.

Exploratorium Live Stream Video PagePhoto courtesy of the © Exploratorium

Brightcove: Tell me a little more about how live events drive awareness for the Exploratorium.

Rob Rothfarb: We have a very active webcasting program, and one of the things that we’ve focused on since 1998 has been expeditions to transmit live images of total solar eclipses from different parts of the world. By helping people to experience natural phenomena like an eclipse, we hope to inspire people’s curiosity so that they can make their own observations and hopefully experience a total solar eclipse in person. We present this as part of our educational mission with support from NASA and in the case of the eclipse this year, also with support from the National Science Foundation.

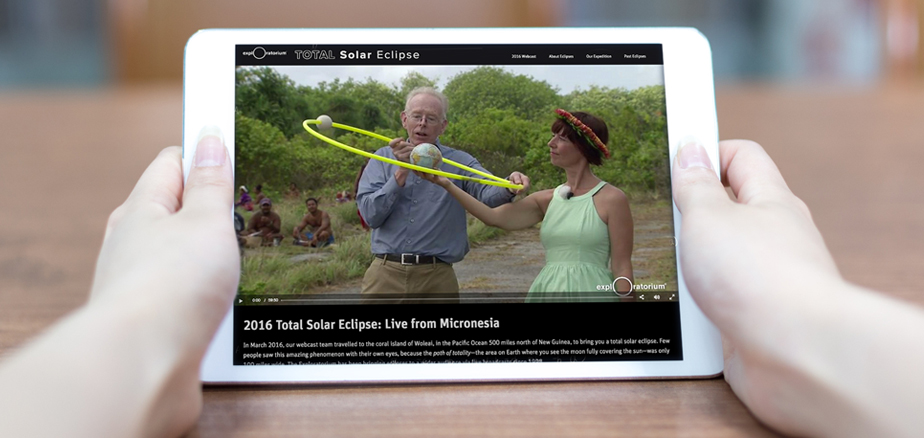
In addition to the dramatic live views of a total solar eclipse, we create additional educational content to drive awareness by addressing questions like: Why do we see eclipses? How do they work? What are the celestial mechanics involved? And then also diving a little bit into the local cultural aspects of the places that we visit as they experience a total solar eclipse.

Brightcove: How did you promote this eclipse? Through educational partnerships?

Rothfarb: Our website was the primary channel that we used to let people know that we had an expedition going to Micronesia to capture images of the eclipse. We also worked with NASA and news media to make the program available to them. A lot of news media picked it up, like ABC and the L.A. Times as well as astronomy websites and  local blogs in San Francisco. We transmitted the program both to the Internet and also made it available via satellite to other partners. Some people picked it up that way, like NASA TV and the Associated Press as well as other news organizations. We also transmitted the live video from Brightcove into the 3D virtual world of Second Life, where we had two different viewing events which brought avatars from all over the world together to watch the eclipse.

We let people embed our live video on their blogs and websites, and many did. We found that actually more people watched the live event on other websites using our stream than on our own website, which was interesting to see.

Brightcove: So when you’re developing a video campaign of this depth and scale, how do you facilitate exposure on different channels?

Rothfarb: We wanted to make sure that the program reached both the general public and specific educational audiences. So we had a multipronged strategy. We used social media and our public website to push it to a general audience. But we also reached out to hundreds of museums and educational partners to let them know that we were making the live stream available for them to create their own educational programming around. That’s pretty key for us—we want to let other educational institutions create their own public programming or online programming using our live feed.

Brightcove: How would you advise others getting started with live broadcasting to make the most of their event?

Rothfarb: I think the key is getting the word out.

We offered to let other websites and bloggers embed the live stream and build their own articles or stories around it. Also, we put out messaging like, “Don’t just watch it on your computer. Create a solar eclipse-viewing event or party in your living room.” “Share the video to your television!” “Use our mobile app to watch it on the go, or share it to other devices for enhanced viewing.” People need to know their options.

Because of the location, this particular eclipse wasn’t a well-covered news story in the West, so it was, in a way, a little bit like the forgotten eclipse. So promotion was essential, but also coordination and logistics. Having a production crew in the field, and setting up backchannel communications is key. We had this all filtering back to the Exploratorium so we could understand what was going on and to coordinate the broadcast.  Giving our audience a sense of what’s going on behind the scenes—bringing live images from a telescope on the other side of the globe to their screen, was part of our story as well. We created additional content assets to share some of the details of the live stream on our blog and web page.

Exploratorium Micronesia Video BlogPhoto courtesy of the © Exploratorium

Brightcove: You had to film on the remote island of Woleai in Micronesia, set up an uplinking feed to a satellite, and then turn that into a web-friendly feed for worldwide consumption. Could you walk us through those technological logistics?

Rothfarb: There are many layers of challenges from communications equipment, telescopes, and the mechanism to translate the optic signal from telescope to video. It was all challenging to set up, but the satellite transmission worked perfectly. For the Internet transmission, we focused a lot on encoding, the format, resolutions, and bitrates we were encoding it in, publishing the streams with customized video players, and then making sure that we tested everything. We had multiple test windows with additional satellite time before the event to rehearse everything. That’s really key.

We worked with Encompass on the encoding and getting the video into the Brightcove cloud via Akamai. We worked with Brightcove to test all of our renditions and used the media API to create the programs that we needed. We also used different Brightcove players and spent a fair amount of time customizing them to our specifications. We delivered live closed captions for our main program and that required setup and testing.

Brightcove: Is this the first time that you’ve partnered with Brightcove for a live stream?

Rothfarb: We’ve been Brightcove customers since 2011, and there has not been a total solar eclipse since 2008—that we broadcast anyway. So this was the first total solar eclipse we broadcast using Brightcove. Total solar eclipses tend to come in pairs, occurring every couple of years. In 2012, we used Brightcove to live broadcast a rare planetary eclipse: the transit of Venus. It passed in front of the sun and we broadcast the entire transit for 6.5 hours. It was amazing and very successful for us.

Brightcove: Now that the live event has ended, how do you continue to utilize or repurpose the live video content?

Rothfarb: Our mobile app has a very extensive on-demand library. So people can watch the full three-hour broadcast from the app as well as on our website and all the other produced educational video pieces that we’ve created for the eclipse. We also have our complete archive of all past eclipse expeditions available. So our app and website are active resources.

Online, there was quite a lot of video viewing activity at the end of March into the middle of April, even though this event occurred March 8th and 9th. People are still discovering the video content and watching it on our website and in our mobile app. It has a pretty good tail. We also featured all of the video programming in our webcast studio at the Exploratorium for about a month and a half after the eclipse event.

We’re utilizing the eclipse of 2016 to get people excited about seeing the next total solar eclipse which will be on August 21st, 2017.  The path the shadow of the moon will take in 2017 is directly over the United States—from coast to coast—allowing millions of people to be able to see the eclipse with their own eyes. We’re planning to broadcast it live on our website and mobile app.

Exploratorium Solar Eclipse Live Stream Mobile AppPhoto courtesy of the © Exploratorium

Brightcove: What have viewers’ reactions been like from an emotional standpoint?

Rothfarb: It’s tremendous. People are very moved by seeing a total eclipse, even through live video.

We’re committed to doing it with the highest quality so that people can really see the drama of the natural phenomenon as it unfolds. To see the corona of the sun and features like the prominences, or the streamers that come off of the sun as well as sun spots… you can see all that in our webcast, it’s very dramatic.

One of the things that we were committed to with this eclipse was helping the people in Micronesia understand the phenomenon. So we did a lot of educational outreach in the schools there with our field team prior to the eclipse. We handed out safe-viewing glasses and helped them to understand why the eclipse was happening. They appreciated learning about it and celebrated it!

Exploratorium Solar Eclipse Micronesia EducationPhoto courtesy of the © Exploratorium

Brightcove: Technology made this possible, but understanding the effect on real people is always the most interesting part.

Rothfarb: In the museum, we had a program the night of the eclipse, about 900 people watching our live broadcast in the museum at the same time that we were broadcasting it online. People were very emotional, cheering it on, and were very excited to see it unfold.

We did tap into social media to follow the conversation, and you can see some of the emotional reaction to it, especially from people in the area where the eclipse was happening. They were very excited to share their own experiences.  It was great to see the conversation about the eclipse unfolding in the Twitter stream which we embedded in our website and app adjacent to the live video. Adding social media to our live stream took the experience even further for our viewers and created a connection with other virtual eclipse watchers.

Technical and Marketing Lessons

This project, from head to tail, is simply remarkable. A remote live event, live streaming of said event across devices and in-app, satellite viewing events, press and community promotion, social interaction and reaction, all with unseen technical elements working seamlessly to deliver a remarkable experience through online video. It’s no wonder that Rothfarb and his team won a Gold GLAMi Award (previously the Best of the Web Awards).

The children of Micronesia aren’t likely to forget their first solar eclipse, but neither are those watching halfway across the world. Even if you don’t have the technical experience of Rob Rothfarb and the Exploratorium team, there are still some takeaways for marketers looking to utilize live streaming for their next big event.

  • Integrate in-person and online communities by making your live stream embed widely available.
  • Let people peek behind-the-scenes with additional content created in advance leading up to the event.
  • Interact and promote your content socially and to online communities (ex. Second Life).
  • Extend the life of your event by making the life event video available on-demand.

VIDEO.JS 5’S FLUID MODE AND PLAYLIST PICKER

How Fluid Mode Works

In video.js 5.0, we added support for truly fluid layouts with video.js. It’s done by using intrinsic ratios, video.js does the heavy lifting for you.

How to Use Fluid Mode

To make a player fluid in video.js, you can either set the fluid option:

let player = videojs('preview-player', {
  fluid: true
})

Or you can add one of the fluid classes to the player: .vjs-fluid.vjs-4-3.vjs-16-9:

<video id="preview-player" class="video-js vjs-fluid" controls data-setup={}>

.vjs-4-3 maintains a 4:3 aspect ratio for the video and .vjs-16-9 maintains a 16:9 one. .vjs-fluid is a bit more special. It waits for the video metadata to load and then uses the video width and video height to calculate the correct aspect ratio to use for the video.

Playlist Picker

This works great if you only have the player by itself. What if you are trying to a attach a playlist to the video element and keep it at the same height—like we did on the advanced example page on the video.js website?

We could calculate how much the padding top should be depending on the width of the playlist picker or the container element but then each time a video changes we would need to recalculate the height of the playlist picker. Instead, we can rely on video.js to do all the work.

Attaching the Playlist Picker

For this example, We’re using the videojs-playlist-ui and videojs-playlist plugins for the playlist functionality. We then wrap the player in a container and put the playlist-ui element in there as well.

<section class="main-preview-player">
  <video id="preview-player" class="video-js vjs-fluid" controls preload="auto" crossorigin="anonymous">
    <p class="vjs-no-js">To view this video please enable JavaScript, and consider upgrading to a web browser that <a href="http://videojs.com/html5-video-support/" target="_blank">supports HTML5 video</a></p>
  </video>
  <ol class="vjs-playlist"></ol>
</section>

Now we can relatively quickly make them align together with some CSS:

.video-js {
  width: 70%;
  float: left;
}
.vjs-playlist {
  width: 30%;
  float: right;
}

How to Make the Playlist Picker Fluid

Video.js calculates the aspect ratio and then adds a stylesheet to the page:

.preview-player-dimensions.vjs-fluid {
  padding-top: 41.66666666666667%;
}

That percentage results in a 2.4 aspect ratio which matches that of the oceans clip.

So to make sure that the playlist picker is the same height, we can just add the player dimensions class to it:

<ol class="vjs-playlist preview-player-dimensions vjs-fluid"></ol>

How to Make It Line Up

One of the easiest ways of making these two things line up correctly is to use flexbox. It’ll make the player and playlist picker grow to fill up as much space as needed. Also, the playlist picker collapse underneath the player if the width of the page is too small.

Flexbox is available on a lot of platforms. However, some browsers were implementing flexbox as the specification for it was evolving. It’s probably best to run this css through something like autoprefixer. Using autoprefixer won’t make it work on browsers that don’t support flexbox but will significantly increase platform support.

First, we set display to flex and add some properties for wrapping and sizing:

.main-preview-player {
  display: flex;
  flex-wrap: wrap;
  justify-content: space-between;
}

flex-wrap allows playlist picker to wrap to the next line if the width of the container is too small.

Then we want to position the player and playlist picker relative to the container and set some default and minimum sizes:

.video-js,
.vjs-playlist {
  position: relative;
  min-width: 300px;
  min-height: 150px;
  height: 0;
}

And finally, we want to apply the flex setting to the player and playlist picker:

.video-js {
  flex: 3 1 70%;
}
.vjs-playlist {
  flex: 1 1 30%;
}

This tells the player to grow and take up 3x the space as the playlist picker and defaults to 70% of the width. The playlist picker itself defaults to 30% of the width and is allowed to grow and shrink as necessary.
Now if we load this in a browser we see a problem: The playlist isn’t the right height.

This is because the playlist-ui plugin sets its own padding on the element that ends up overriding the preview-player-dimensions padding-top. We can fix this by forcing the padding-top we want. However, while this solves our height problem, where are our items? You need to scroll to get them.

This happens because our padding-top is inside the playlist picker; it pushed all the elements down requiring scrolling to get to them.

Solution

Ultimately, what we need to do is wrap the playlist element in a container that flexes so that the padding-top doesn’t push the playlist items down.

<div class="playlist-container  preview-player-dimensions vjs-fluid">
  <ol class="vjs-playlist"></ol>
</div>

We also change the vjs-playlist references to playlist-container and absolutely position the playlist picker inside its container:

.playlist-container {
  position: relative;
  min-width: 300px;
  min-height: 150px;
  height: 0;
}
.playlist-container {
  flex: 1 1 30%;
}
.vjs-playlist {
  margin: 0;
  position: absolute;
  top: 0;
  bottom: 0;
  left: 0;
  right: 0;
}

HTML

<section class="main-preview-player">
  <video id="preview-player" class="video-js vjs-fluid" controls preload="auto" crossorigin="anonymous">
    <p class="vjs-no-js">To view this video please enable JavaScript, and consider upgrading to a web browser that <a href="http://videojs.com/html5-video-support/" target="_blank">supports HTML5 video</a></p>
  </video>
  <div class="playlist-container  preview-player-dimensions vjs-fluid">
    <ol class="vjs-playlist"></ol>
  </div>
</section>

CSS

.main-preview-player {
  display: flex;
  flex-wrap: wrap;
  justify-content: space-between;
}
.video-js,
.playlist-container {
  position: relative;
  min-width: 300px;
  min-height: 150px;
  height: 0;
}
.video-js {
  flex: 3 1 70%;
}
.playlist-container {
  flex: 1 1 30%;
}
.vjs-playlist {
  margin: 0;
  position: absolute;
  top: 0;
  bottom: 0;
  left: 0;
  right: 0;
}

VIDEO IN MARKETING AUTOMATION: 3 UPDATES TO MAKE IT EASIER

If you’re not familiar with Brightcove Audience or how to leverage video in marketing automation, you’re missing out on a powerful way to enhance your marketing strategy. With the introduction of Audience, Brightcove enables the seamless integration of video data into marketing automation platforms. This integration allows you to track which videos a person has viewed, how much they’ve watched, and tie that information directly to their contact record in your marketing automation platform. With this insight, you can take targeted actions to drive engagement and conversions.

The Brightcove Audience module is continually expanding, offering new features to support your marketing goals. If you’re already using Audience, these new features are available to you today.

CUSTOM FORMS FOR LEAD GENERATION

Audience has always allowed you to create lead generation forms that appear directly within the video player. These leads are automatically captured by Audience and sent to your marketing automation platform. Now, Audience offers even greater flexibility by enabling you to insert HTML from third-party forms.

For example, you can create a custom form in your marketing automation platform and embed the code into Brightcove. This functionality allows you to perform advanced marketing tasks like lead routing and progressive profiling directly within the player—whether it’s embedded on your homepage, a social media channel, or a third-party website.

NEW CONTENT SERVICE IN ELOQUA

If you use Eloqua as your marketing automation platform, you can now leverage a built-in content service directly within the Eloqua interface under “Cloud Content.” This service lets you easily add videos to your landing pages. Simply drag the video element onto your page, double-click it, select the video and player you want to use, and you’re done. This streamlined process simplifies video integration and helps you create more engaging landing pages in less time.

ENHANCED DASHBOARD FOR VIDEO INSIGHTS

We’ve listened to customer feedback and introduced a new dashboard within the Audience tab to help you visualize the data collected by Audience. This dashboard provides a quick and intuitive overview of the performance of your Audience-enabled video players. Key reports include:

  • Most viewed videos: See which videos attract the most attention.
  • Most impactful videos: Identify the videos that generate the most engagement and conversions.
  • Viewing trends: Analyze user behavior over time to identify patterns or anomalies.

The dashboard allows you to view data over multiple time frames—7 days, 30 days, or 90 days. By checking the dashboard daily, you can quickly respond to viewing trends or unusual changes in audience behavior before diving into your other tasks.

With these new features and capabilities, Brightcove Audience empowers you to harness the full potential of video in your marketing automation efforts, driving better insights, engagement, and results.

HOW TO GET STARTED WITH UHD IN ZENCODER

Ultra High Definition (UHD) is not only about higher resolutions that reach as high as 4K. It’s also about support for new video codecs (HEVC and VP9) and enabling workflows for high dynamic range (HDR) content through support for 10-bit color processing and the BT.2020 color space.

New customers or premium subscription customers do not need to do anything and automatically have access to the new features. Customers on one of the monthly plans (Pay-as-you-go, Launch, Traction or Growth), can enable these new features by going to the Zencoder Account Page, and clicking on the Activate Now button in the Activate UHD Transcoding section.

Here are some pointers to help you get started with these new features.

HEVC and VP9 Video

High efficiency video codec (HEVC) and VP9 are both advanced codecs that offer greater compression than H.264, the most commonly used codec today. If you want to deliver 4K video, or if you simply want to use fewer bits to deliver HD video, these codecs are worth looking at. The disadvantage is that neither of these codecs are as widely supported as H.264 is today, although this situation is changing daily.

We’re not going to offer advice as to whether you should choose HEVC or VP9—there is plenty of healthy debate about both of them on the web and you should make up your own mind based on your testing as well as the nature of your business and devices that you wish to reach. One thing to keep in mind, though, is that both of these codecs are under very active development. We’ve seen quality, bitrate, and performance improvements with each release of the codecs, and there’s every reason to believe that this will continue.

Generating HEVC and VP9 outputs in Zencoder is very straightforward. Similar to H.264, we provide a set of codec parameters that you can control. We’ve chosen sensible defaults, which you can use if you’re trying them out for the first time.

As an example, we’ll use our API Request Builder to create a simple job that generates an H.264, HEVC and VP9 output for download from an input that is stored on AWS S3. We’ve explicitly specified the format (container) and video codec to make it very clear for the example, but any other codec parameters use defaults because they are unspecified.

{
 "input": "s3://zencodertesting/test.mov",
 "outputs": [
   {
     "label": "h264",
     "url": "s3://my-bucket/h264-output.mp4",
     "format": "mp4",
     "video_codec": "h264"
   },
   {
     "label": "hevc",
     "url": "s3://my-bucket/hevc-output.mp4",
     "format": "mp4",
     "video_codec": "hevc"
   },
   {
     "label": "vp9",
     "url": "s3://my-bucket/vp9-output.webm",
     "format": "webm",
     "video_codec": "vp9"
   }
 ]
}

If you want to create outputs for streaming delivery of HEVC or VP9, you should use MPEG-DASH. For example, for delivery of 4K content to a Roku 4 streaming device, you can use HEVC packaged as MPEG-DASH. Here’s an example that shows how to add an 4K HEVC output to an MPEG-DASH job:

{
  "input": "s3://zencodertesting/test.mov",
  "outputs": [
    {
        "label": "dash-hevc",
        "base_url": "s3://mybucket/uhdtest/video/8000_main420_10/",
        "format": "m4f",
        "type": "segmented",
        "streaming_delivery_format": "dash",
        "streaming_delivery_profile": "live",
        "segment_seconds": 5,               
        "video_codec": "hevc",
        "width": 3840,
        "filename": "8000.mpd",
        "video_bitrate": 6000,
        "decoder_bitrate_cap": 6000,
        "decoder_buffer_size": 12000,
        "video_codec_profile": "main10",
        "video_bit_depth": 10,
        "audio_bitrate": 128,
        "audio_codec": "aac",
        "audio_sample_rate": 44100
    }
  ]
}

4K and UHD

We’ve introduced a new UHD pricing tier for output resolutions greater than 2048×1080, and 4096×2160 or less.

Outputs within the UHD pricing tier are charged at four times the SD rate, or twice the HD rate. For example, if you have a 4K input file and create a 1080p output, you will be charged at the HD rate of 2x SD, but if you create a 4K output, you will be charged at the UHD rate of 4x SD.

If you regularly work with 4K media, you should ensure that you use the resolution settings to control the resolution of your output video so that you only incur UHD tier charges when you actually require them.

{
  "input": "s3://zencodertesting/4K_test.mov",
  "outputs": [
    {
      "label": "1080p_h264",
      "url": "s3://my-bucket/1080p_h264-output.mp4",
      "format": "mp4",
      "video_codec": "h264",
      "size": "1920x1080"
      // ^^ This will be charged at the HD rate.
    },
    {
      "label": "4K_hevc",
      "url": "s3://my-bucket/4K_hevc-output.mp4",
      "format": "mp4",
      "video_codec": "hevc"
      // ^^ This will be charged at the UHD rate, because the input is 4K and
      //    no output resolution was specified.
    },
    {
      "label": "1080p_hevc",
      "url": "s3://my-bucket/4K_hevc-output.mp4",
      "format": "mp4",
      "video_codec": "hevc",
      "size": "1920x1080"
      // ^^ This will be charged at the HD rate, an HD output resolution was specified.
    }
  ]
}