Setting up an end-to-end encrypted transcoding pipeline
Tech Talk
For many Zencoder customers, ensuring that their content is secure during the transcoding process is a top priority. Now that Zencoder supports encrypted inputs, customers can ensure that their data is never stored in the plain as it flows through Zencoder. In short, Zencoder can accept encrypted input, decrypt it for transcoding, then re-encrypt output videos before writing them to a storage location. The importance of this workflow is that both inputs and outputs are then protected. If an unauthorized user were able to access these encrypted files, they would be unable to view them without the key and IV pair used to encrypt them. Let's walk through how this process would look. Before we get started, we'll need an encrypted input. For this example, we'll encrypt a file locally using OpenSSL, then upload it to S3 before creating the transcoding job.
$ openssl aes-256-cbc -k zencoderisawesome -in trailer_test.mp4 -out trailer_test.mp4.enc -pThe -k flag is the secret we want to use, which in this case is "zencoderisawesome". The -p flag tells OpenSSL to print out the key when it's done, which we'll need for decryption later. For us, the output looked like this:
salt=9E7E90A964768A2F
key=DAFF64EAE3B3AB9C7905871E407293D4987E16DE76578372E161B1261F39CD66
iv =375FDBBB213C062D544FCB5A6ACBA44E
Now the file is encrypted, so you shouldn't be able to play the file as you would have before. Now we need to upload the file to S3 or an FTP server somewhere so Zencoder can access it. We'll just use the S3 upload interface. 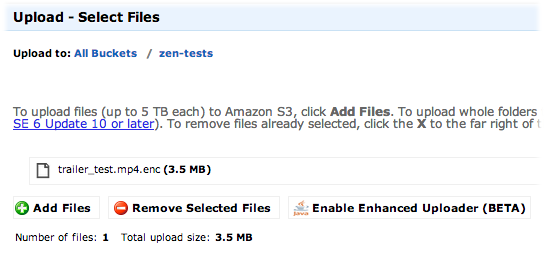 Time to build the request. We'll use the Node.js library to send the request in these examples, but the same requests could also be sent using another tool such as the Request Builder. We'll need to specify the encryption key and IV we used above for the input.
var zencoder = require('zencoder')();
zencoder.Job.create({
  input: "s3://zencoder-demo/trailer_test.mp4.enc",
  decryption_method: "aes-256",
  decryption_key: "DAFF64EAE3B3AB9C7905871E407293D4987E16DE76578372E161B1261F39CD66",
  decryption_password: "zencoderisawesome"
}, function(err, data) {
  if (err) {
    console.log("Job wasn't created");
    return console.log(err);
  }
  console.log("Woo!");
  console.log(data);
});
This would be enough to create a standard h.264 output, but it wouldn't be encrypted in any way. Sometimes this is useful, because you may want to take an encrypted mezzanine file (a very high quality file used to create other, lower quality outputs) and use it for watermarked or lower quality outputs for distribution. Let's pretend we want to take one mezzanine file, and upload it to three different services. We want one output to be an unencrypted, low quality version with a watermark, and the other two to be encrypted using 2 different keys, one with an identifying watermark and the other without. Before we can create this request, though, we'll need to generate the two keys we're going to use. We'll use OpenSSL again to create these new keys:
$ openssl enc -aes-256-cbc -k supersecret -P
salt=12B83BBF81DFA5B7
key=48A9E3FA8A629AEBA5B4F1FAC962920F0D7084E306E0D01A0ED01C920BBCBD08
iv =2B3CABAB503198DB32394245F54E2A34Now we can use these keys when we encrypt the outputs during the transcoding process.
zencoder.Job.create({
  input: "s3://zencoder-demo/trailer_test.mp4.enc",
  decryption_method: "aes-256",
  decryption_key: "DAFF64EAE3B3AB9C7905871E407293D4987E16DE76578372E161B1261F39CD66",
  decryption_password: "zencoderisawesome",
  outputs: [
    {
      url: 's3://some-bucket/decrypted.mp4',
      quality: 3,
      width: 320,
      watermarks: [{
        url: 's3://zencoder-live/test-job-watermark.png'
      }]
    },
    {
      url: 's3://some-other-bucket/encrypted-watermarked.mp4',
      width: 720,
      watermarks: [{
        url: 's3://zencoder-live/test-job-watermark.png'
      }],
      encryption_method: "aes-256",
      encryption_key: '48A9E3FA8A629AEBA5B4F1FAC962920F0D7084E306E0D01A0ED01C920BBCBD08',
      encryption_iv: '2B3CABAB503198DB32394245F54E2A34'
    },
    {
      url: 's3://some-bucket/encrypted-out.mp4',
      width: 720,
      encryption_method: "aes-256",
      encryption_key: '3AAE9D6E5212224BB9F76E328D2BD826F17B4FC292845B6E3B72634D2C28052D',
      encryption_iv: '169C3DE53C56E74130CDA57BA85F8255'
    }
  ]
}, function(err, data) {
  if (err) {
    console.log("Job wasn't created…");
    return console.log(err);
  }
  console.log("Woo!");
  console.log(data);
});
Omitting encryption from one output and encrypting two others separately might seem like a wacky thing to do, but consider the use case. The low quality output could be used as a sample (you could even create a shorter clip for this purpose). One of the high quality versions has a watermark identifying the person the video is being uploaded to, so you could provide them the key to decrypt and watch, and if the video is ever found outside of their control you know who's copy it was. The third, unwatermarked copy would be uploaded back to a bucket we control, so we can use it for distribution later. Once you have one of these encrypted files locally, you can decrypt it using a similar process to the one we used to encrypt it originally. To unencrypt the watermarked file: $ openssl enc -aes-256-cbc -d -K 48A9E3FA8A629AEBA5B4F1FAC962920F0D7084E306E0D01A0ED01C920BBCBD08 -iv 2B3CABAB503198DB32394245F54E2A34 -in encrypted-watermarked.mp4 -out decrypted-watermarked.mp4 To unencrypt the file without the watermark: $ openssl enc -aes-256-cbc -d -K 3AAE9D6E5212224BB9F76E328D2BD826F17B4FC292845B6E3B72634D2C28052D -iv 169C3DE53C56E74130CDA57BA85F8255 -in encrypted-out.mp4 -out decrypted-out.mp4 There you go! You've now got an end-to-end encrypted encoding pipeline. The encrypted file used in these examples is available in that location and was actually encrypted using these credentials, so feel free to use that as a test file. Just a note, this is not to be confused with digital rights management, or DRM. A proper DRM solution handles things like access rights to content which can be much more granular, down to certain devices and users. Encrypted files can only be viewed using the encryption key and associated password, but that's the only criteria.