Watch Folders in the Cloud: Automated transcoding using S3, Lambda, and Zencoder
Tech Talk
Welcome to Brightcove Tech Talk! In our new tech-focused blog, we'll cover video and software engineering topics including best practices for preparing and delivering video to connected devices, how-to guides, and more. For our first post, we'll talk about how to build a simple automated transcoding workflow using Zencoder, Lambda, and S3, using only a few lines of code.
Watch folders (also called “drop folders” or “hot folders”) are a quick and easy tool for batch automating any file-based workflow. If you regularly transcode your media to the same set of formats, you can just drop raw files in a folder and watch transcoded files come out the other end. This is a common step in video post-production workflows to prepare media for client approval or generate multiple delivery formats for distribution.

This post is an exercise in using Lambda to glue together resources — dropping a file into an S3 bucket will kick off a transcoding job using the Zencoder API, which will send the resultant files back to S3. This method could be further adapted to automate other steps in your workflow; for example, performing additional actions on the transcoded files (such as generating push notifications or moving the files to a CDN).
If you’re a developer and already comfortable with AWS, you may want to jump straight to the Lambda function in Step 3, or just grab the example code from GitHub and get up and running yourself.
Why transcode in the cloud?
Watch folders are supported by common encoders such as Adobe Media Encoder, Telestream, and Sorenson Squeeze. For small-scale encoding, licensing Sorenson or Adobe products may not be cost effective, and for a high volume of content, configuring and maintaining a fleet of encoding servers could be expensive and time-consuming.
The tools we’ll use (Zencoder, S3, and Lambda) are inexpensive and charge on a per-use basis with no upfront costs or minimums, so our watch folder will be cost-efficient for both small- and large-scale loads. At 3¢/GB for S3 storage and 5¢/min of transcoded output from Zencoder (as low as 2¢ at high volumes), you can estimate your usage easily. Since the output files will be written to S3, they are immediately available for web distribution.
How does it work?
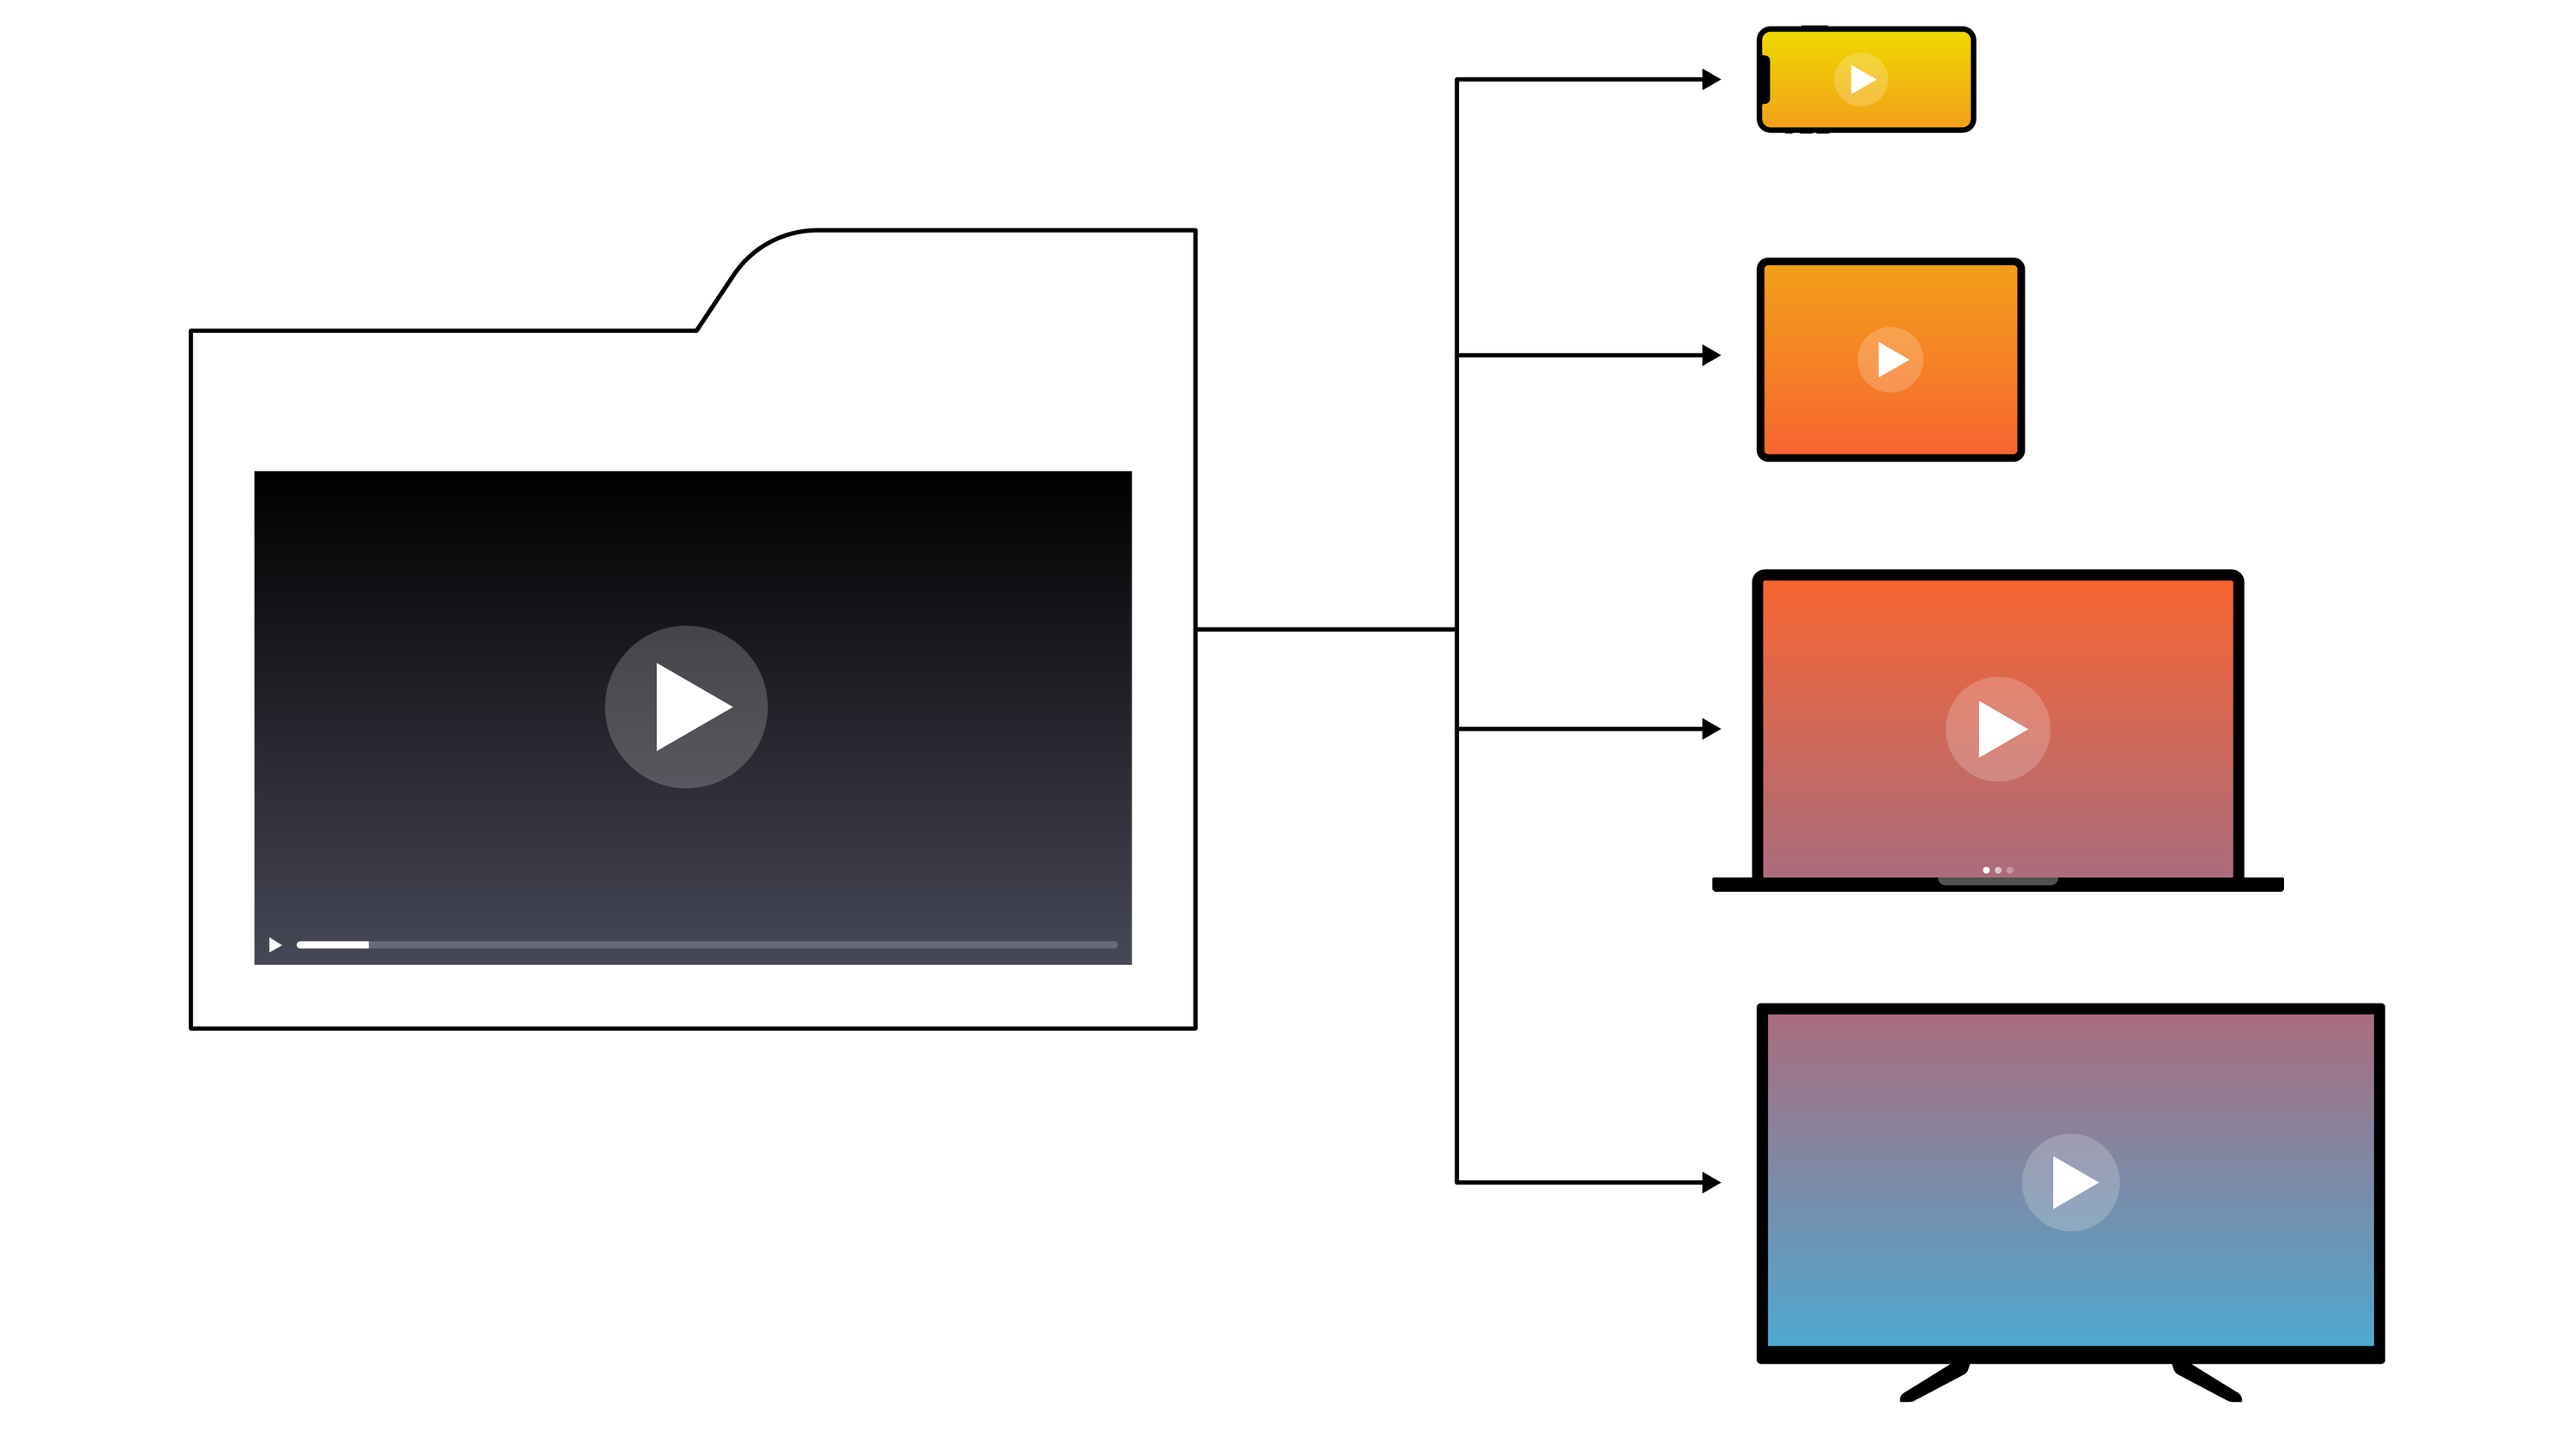
Our watch folder will live inside an Amazon S3 bucket. Uploading a file to the bucket will trigger our Lambda function, which composes and submits a request to the Zencoder API to create an encoding job. Zencoder will retrieve the file from S3, transcode it to the output formats that we’ll define, and then drop the transcoded files back into S3. From there, they can be distributed to your clients, or even delivered directly to end-users via CloudFront or another CDN.
Prerequisites
For this tutorial, you will need an Amazon Web Services (AWS) account and a Zencoder account. The free tiers of both services will suffice for demonstration purposes, though you’ll only have 5GB of S3 storage, and Zencoder will truncate outputs to 5 seconds.
Step 1: Set up an S3 bucket
First, we’ll need to set up the watch folder on S3. If you don’t already have an S3 bucket set up, log in to the AWS console and navigate to the S3 service. Click “Create Bucket” and give it a name. Bucket names are unique across the entire service, so it helps to use a unique prefix, like your name or company name.

Leave the region as US Standard, which is the same as Zencoder’s default region. This prevents incurring S3 transfer charges when Zencoder retrieves your files. If you need to use a bucket in a different region, you can add the “region” parameter to the Zencoder job to ensure that the transcode is run in the same region.
Create two folders in your S3 bucket — one for the files you’ll upload, and one to which Zencoder will upload the transcoded files. I’ve simply used “inputs/” and “outputs/”.
Step 2: Give Zencoder access to the S3 bucket
There are two ways to grant Zencoder access to read and write files to your S3 bucket. The simplest way is to add a policy to your S3 bucket granting Zencoder’s IAM user access to the bucket.
In the Properties pane for the S3 bucket, click on Permissions, and then Add Bucket Policy. Paste in Zencoder’s bucket policy (available in the Zencoder documentation, or this Github repo), replacing both instances of “YOUR-BUCKET” with the actual bucket name specified in Step 1.

The other option to grant Zencoder access to your bucket is to create an IAM user with an AmazonS3FullAccess policy (or restrict it to this bucket), and then add that user’s Access Key ID and Secret Access Key to the Credentials section of your Zencoder account.
Step 3: Create the Lambda function

From the AWS console, click on the Lambda service. Click on Create a Lambda Function (or Get Started, if this is your first time using Lambda). Skip the blueprint step, and you’ll see the Configure Function screen. Give your function a name (i.e. “transcode Video”) and select Python 2.7 as the runtime.
Paste the example code into the Lambda function code section. You’ll need to edit some of the global vars at the top — set the API_KEY to your Zencoder Full Access API key, change the INPUT_FOLDER_NAME to match the name of the watch folder you created in S3, change theS3_OUTPUT_BASE_URL to the bucket and folder name where you would like the output files stored, and set the NOTIFICATION_EMAIL to an email address where you’d like to receive notifications from Zencoder (if you don’t want notifications, just omit line 39 of the Lambda function).
About the code in lambda_function.py - essentially, we’re grabbing the name of the file that was uploaded to S3 and using it as the basis of the output filename. The api_data object is the job that will be sent to Zencoder, with all of the outputs and encoding parameters defined. You can modify this to suit your needs, and Zencoder provides several templates in their Request Builder. Then we’re submitting the job to the Zencoder API endpoint and logging the response.
Next, select S3 Execution Role under the Create New Role heading. You may need to enable popups in your browser to see the creation screen, which prompts you to name the new role and click Allow. This role defines the permissions scheme that the Lambda function will run under — in this case, we’re granting Lambda access to the S3 bucket. Back on the Lambda screen, the new role you created should now be selected in the Role field.
Increase the timeout to 10 seconds. In practice, the function will rarely take more than 1500ms seconds to run, but our function will be more resilient if it can wait a few extra seconds in case of a slow API response. Lambda charges for every 100ms of function run time, so we won’t set it too high. Click Next, and then Create Function.
On the Event Sources tab, add an event source. Select S3 as the type, choose the S3 bucket from Step 1, and set the Event type to Object Created (All).

In the Prefix field, enter the name of the watch folder you created in the S3 bucket (e.g. “inputs/”). This will ensure the Lambda function is only triggered when files are added to that folder, and not elsewhere in the bucket — and most importantly, this will also prevent our output files from triggering more encoding jobs in an endless loop. Check Enable event source and submit.
That’s it
We’ve got an S3 bucket with a watch folder and we’ve got a Lambda function that receives file creation events from that watch folder, which forms a Zencoder job to transcode those files and drop them back into our output folder. Upload some media to your watch folder to see it in action.
If you need to troubleshoot, check the AWS CloudWatch logs for details of each call to your Lambda function. Zencoder’s Jobs view also provides details of each job and any errors that may have been thrown.