Building an application around Zencoder, Part 2: Persisting media data (using NeDB)
Tech Talk
Note: This is Part 2 of a series on building an application around Zencoder. In part 1, we built a basic application that allowed us to upload a file, transcode it, and publish the Zencoder notifications to the browser via websockets. If you'd like to start from the end of the last post, clone the repository and checkout the branch "3_personal-namespace".
$ git clone git@github.com:zencoder/zensockets.git
$ cd zensockets
$ git checkout 3_personal-namespace
Adding in persistance
In the first post, we concentrated entirely on the foundation of the app and handling notifications, but we never saved any information about the videos themselves. In the app's current state, once a video is uploaded and all the notifications are sent, it's like it never happened at all. In this post we'll add the ability to persist information about uploaded videos to a database so we can save extra information about videos and show a list of uploads to new visitors.
In order to avoid needing to install a database server on our development environment, we'll use NeDB. If you're familiar with SQLite, you can think of NeDB as the Node.js, NoSQL equivalent. Just like SQLite, this isn't something you should use in production, but we'll go over concepts that translate well to any database or language.
The first thing we'll need to do is add NeDB to our dependencies and require it in our application. First, install the NPM module and save it to package.json.
$ npm install nedb --saveAfter this successfully runs, your package.json should look similar to this:
{
  "name": "Zensockets",
  "version": "0.0.1",
  "private": true,
  "scripts": {
    "start": "node app"
  },
  "dependencies": {
    "express": "3.1.0",
    "jade": "*",
    "zencoder": "~0.4.2",
    "socket.io": "~0.9.16",
    "nedb": "~0.8.6"
  }
}
Now we can require NeDB in our app.js file just like all the other modules.
var express = require('express')
  , http = require('http')
  , config = require('./config')
  , path = require('path')
  , Zencoder = require ('zencoder')
  , app = express()
  , server = http.createServer(app)
  , io = require('socket.io').listen(server)
  , Datastore = require('nedb');
Now we can create whatever data stores we need. If the file doesn't already exist, NeDB will create it for you.
var Media = new Datastore({ filename: 'db/media', autoload: true })Now that we're going to start persisting our videos to a database, we need to think about our work flow. There's a 100% reliability guide in the Zencoder documentation that's a great reference, so we'll be following most of the recommendations outlined there.
In a nutshell, we want to be able to look up a video in the database and see it's current state at any point during the process. This means we'll need to create an entry for a video before we even send the job to Zencoder, which will allow us to identify any requests that failed before transcoding and retry them later if necessary. With all of this in mind, let's modify the /job route to add a new media file to the database.
app.post('/job', function(req, res) {
  var input = req.body.input_file;
  var channel = req.body.channel;
  var notification_url = config.zencoder.notification_url + channel;
    zc.Job.create({
      input: input,
      notifications: notification_url,
      pass_through: newDoc._id,
      outputs: config.zencoder.outputs()
    }, function(err, data) {
      if (err) {
        io.sockets.emit(channel, {error: true, type: 'job.create', message: 'Something has gone terribly wrong...', error: err});
        Media.update({_id: newDoc._id}, {$set: {state: 'pending'}});
        return;
      }
      Media.update({_id: newDoc._id}, {$set: {state: 'transcoding'}});
      io.sockets.emit(channel, {type: 'job.create', message: 'Job created!', job_id: data.id, outputs: data.outputs})
    });
  });
});
All we're doing differently from before is creating a new document before sending the request to Zencoder, then updating the state of that document depending on whether or not the request was successful. The problem now is that we have no way of associating this data with the notification later. There are multiple ways to handle this, but my preferred method is to include the new document ID in the pass_through field of the request to Zencoder. This will be returned with the notification, allowing you to reconcile the notification with the original database entry.
Media.insert({submitted_at: new Date(), state: 'submitting'}, function(err, newDoc) {
  res.send(202, {message: 'Success!', internal_record: newDoc._id, notification_namespace: channel});
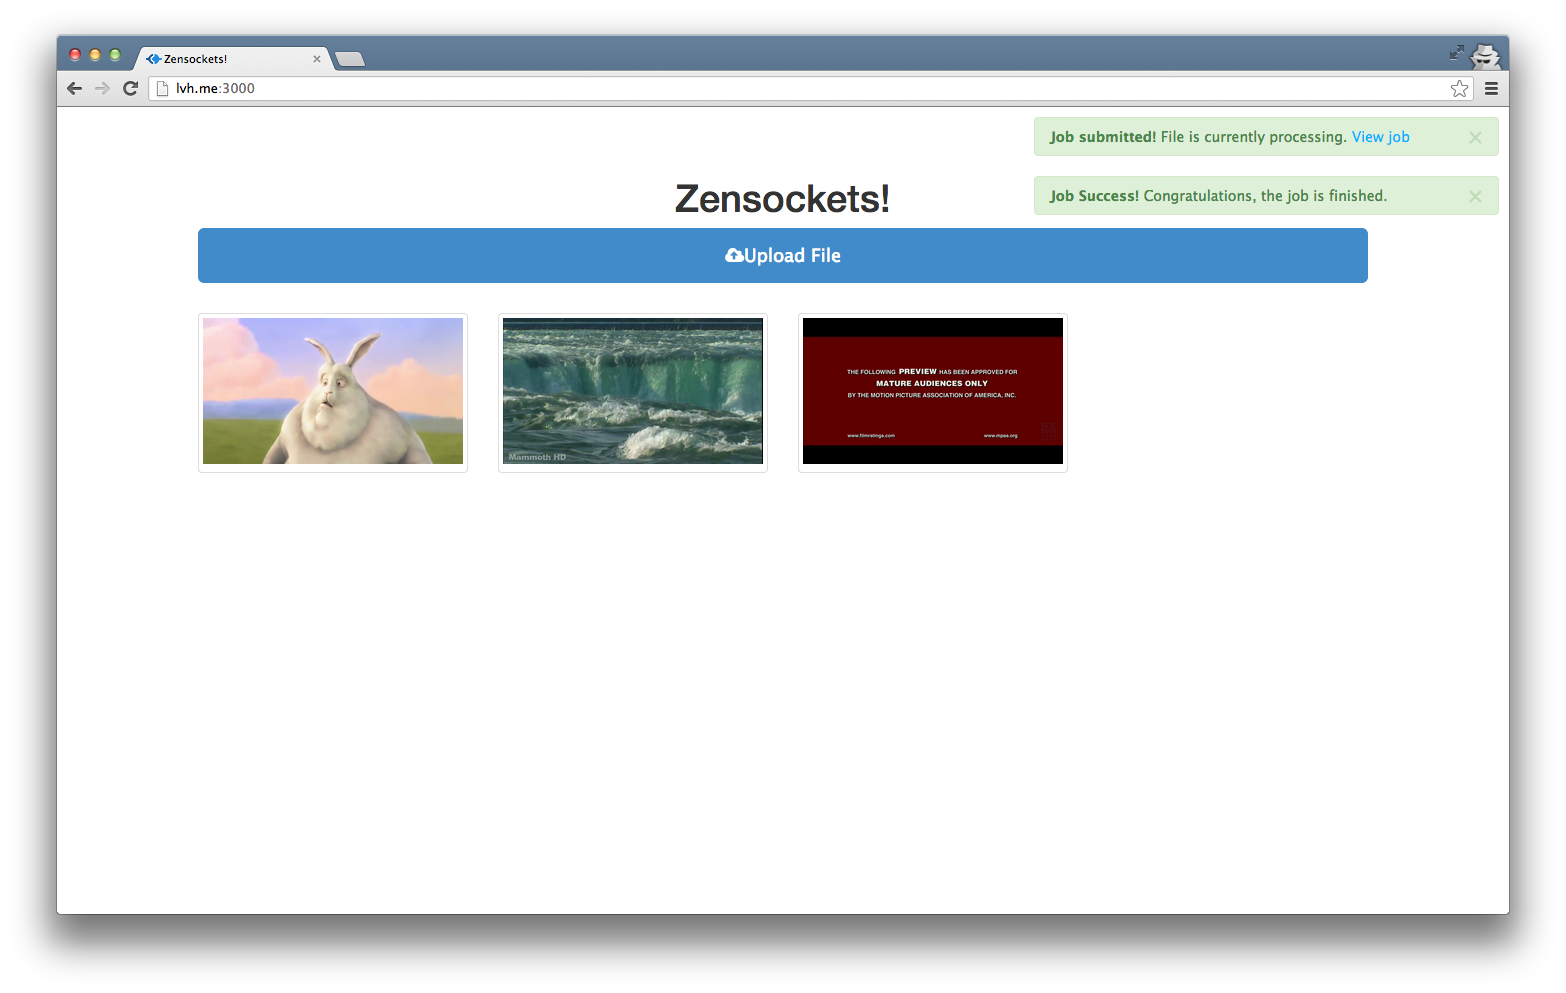
Go ahead and start up your application ($ npm start or $ nodemon app.js) and upload a file. If you open db/media, you should see a new lines showing up that look like this:
{"submitted_at":{"$$date":1376951210365},"state":"submitting","_id":"v4wZ4b57OSSuJSRK"}Great! Now we need to start updating this entry when we get updates about our encoding job. When we receive the notification from Zencoder, instead of just publishing a notification we now need to also the entry in the database. This is going to seem like quite a bit at once since we're having to do some parsing of the incoming notification.
app.post('/notify/:id', function(req, res) {
  // Let Zencoder know we got the message
  res.send(202, {message: "Thanks, Zencoder! We will take it from here."});
    // Check the job status so we can know if it was successful
    if (req.body.job.state == 'finished') {
      jobDoc.state = "finished"
    } else {
      jobDoc.state = "failed"
    }
      jobDoc.outputs[output.label] = {
        url: output.url,
        format: output.format,
        width: output.width,
        height: output.height
      }
    });
The first thing we want to do is respond to Zencoder and let them know we've received the notification and will handle it on our side. Job and output notifications are very similar, so just in case we output notifications get added, let's check to make sure this is for the whole job before continuing (output notifications have a singular output key, and job notifications always have an outputs array). Next we start building up the object we'll actually add to the database. We want to check the state and make sure Zencoder was actually able to transcode the file, so we need to change the state of the job from "submitted" to the final state.
To make things easier for playback later, I like to add the different output types as keys on the job, and since we're already iterating over the outputs we should check for a thumbnail value and save that for easy access. In our current configuration we only have one thumbnail, so we can just check for that key's existence and if available add it to the new job document. When we're done parsing the output and building up the new document, we want to find the original Media document using the ID included in pass_through, then update it with the new object we just created. If you create a new video now, you should find an entry like this in db/media:
{
  "zencoder_id": "56160040",
  "input": {
    "channels": "2",
    "file_size_in_bytes": "245779",
    "audio_codec": "aac",
    "state": "finished",
    "video_bitrate_in_kbps": "341",
    "total_bitrate_in_kbps": "389",
    "duration_in_ms": "4967",
    "audio_sample_rate": "32000",
    "frame_rate": "30",
    "width": "190",
    "format": "mpeg4",
    "height": "240",
    "audio_bitrate_in_kbps": "48",
    "md5_checksum": "null",
    "id": "56138023",
    "video_codec": "mpeg4"
  },
  "outputs": {
    "WebM": {
      "url": "http://zensockets.s3.amazonaws.com/pt2/ecbcf948d1b15e3eb59848d9250f7c11.webm",
      "format": "webm",
      "width": "190",
      "height": "240"
    },
    "MP4": {
      "url": "http://zensockets.s3.amazonaws.com/pt2/a09c44996b56c2d0383f707e716998d1.mp4",
      "format": "mpeg4",
      "width": "190",
      "height": "240"
    }
  },
  "state": "finished",
  "thumbnail": {
    "url": "http://zensockets.s3.amazonaws.com/pt2/frame_0000.png",
    "size": "190x240"
  },
  "_id": "aG2NOZa7rV455wQc"
}
Displaying Database Entries
Before we get started with displaying what's in the database, let's do a little house cleaning on the output side. If you've been paying attention to your output location, you've probably noticed that the thumbnail is named "frame_0000.png" every time, and because of this the newest thumbnail uploaded will constantly replace the previous. To get around this, we can pass the document ID to the outputs function, and use that to generate a unique thumbnail filename.
config.zencoder = {
  ...
  outputs: function(id) {
    // Eventually we may want to pass things to our outputs array.
    var outputs = [
      {
        label: 'MP4',
        base_url: config.zencoder.output_url,
        public: true,
        thumbnails: {
          number: 1,
          base_url: config.zencoder.output_url,
          filename: '{{number}}_' + id,
          public: true
        }
      },
      {
        label: 'WebM',
        base_url: config.zencoder.output_url,
        format: 'webm',
        public: true
      }
    ]
    return outputs;
  }
}
Just in case we want to add multiple thumbnails down the road, we let zencoder interpolate the number value, then append the document ID to the end. This way we can easily associate thumbnails to a job while also ensuring that one job's thumbnail doesn't overwrite another.
Now that we know we have a unique thumbnail for each video, we can use these to display a preview of each database item to a visitor. Let's update our index route to grab all the finished videos from the database and pass them to the view.
app.get('/', function(req, res){
  Media.find({state: "finished"}, function(err, docs) {
    res.render('index', { title: 'Zensockets!', jobs: docs });
  })
});
Now update the index.jade view to include this list of files.
if jobs
  #jobs.row
    each job in jobs
      .col-sm-3.job-item
        .thumbnail
          .video-thumb
            a(href='/media/'+job._id, class='view-media')
              img(src=job.thumbnail.url)
If you upload a new file, you'll notice that nothing changes from before until you refresh the page. All we need to do is update script.js to add an item to the list instead of instantiating a player. Don't throw away the player code that's there right now, just put it off to the side or comment it out since we'll use it to create a new player when a thumbnail is clicked.
function jobState(notification) {
switch(notification.state) {
case 'failed':
displayNotification('error', 'Job Failed!', 'Some of the outputs may have succeeded, but at least one failed.')
break;
case 'finished':
displayNotification('success', 'Job Success!', 'Congratulations, the job is finished.');
$('#jobs').prepend('<div class="col-sm-3 job-item">' +
' <div class="thumbnail">' +
' <div class="video-thumb">' +
' <a href="/video/'+notification._id+'" class="view-media"><img src="'+notification.thumbnail.url+'"/></a>' +
' </div>' +
' </div>' +
'</div>');
break;
}
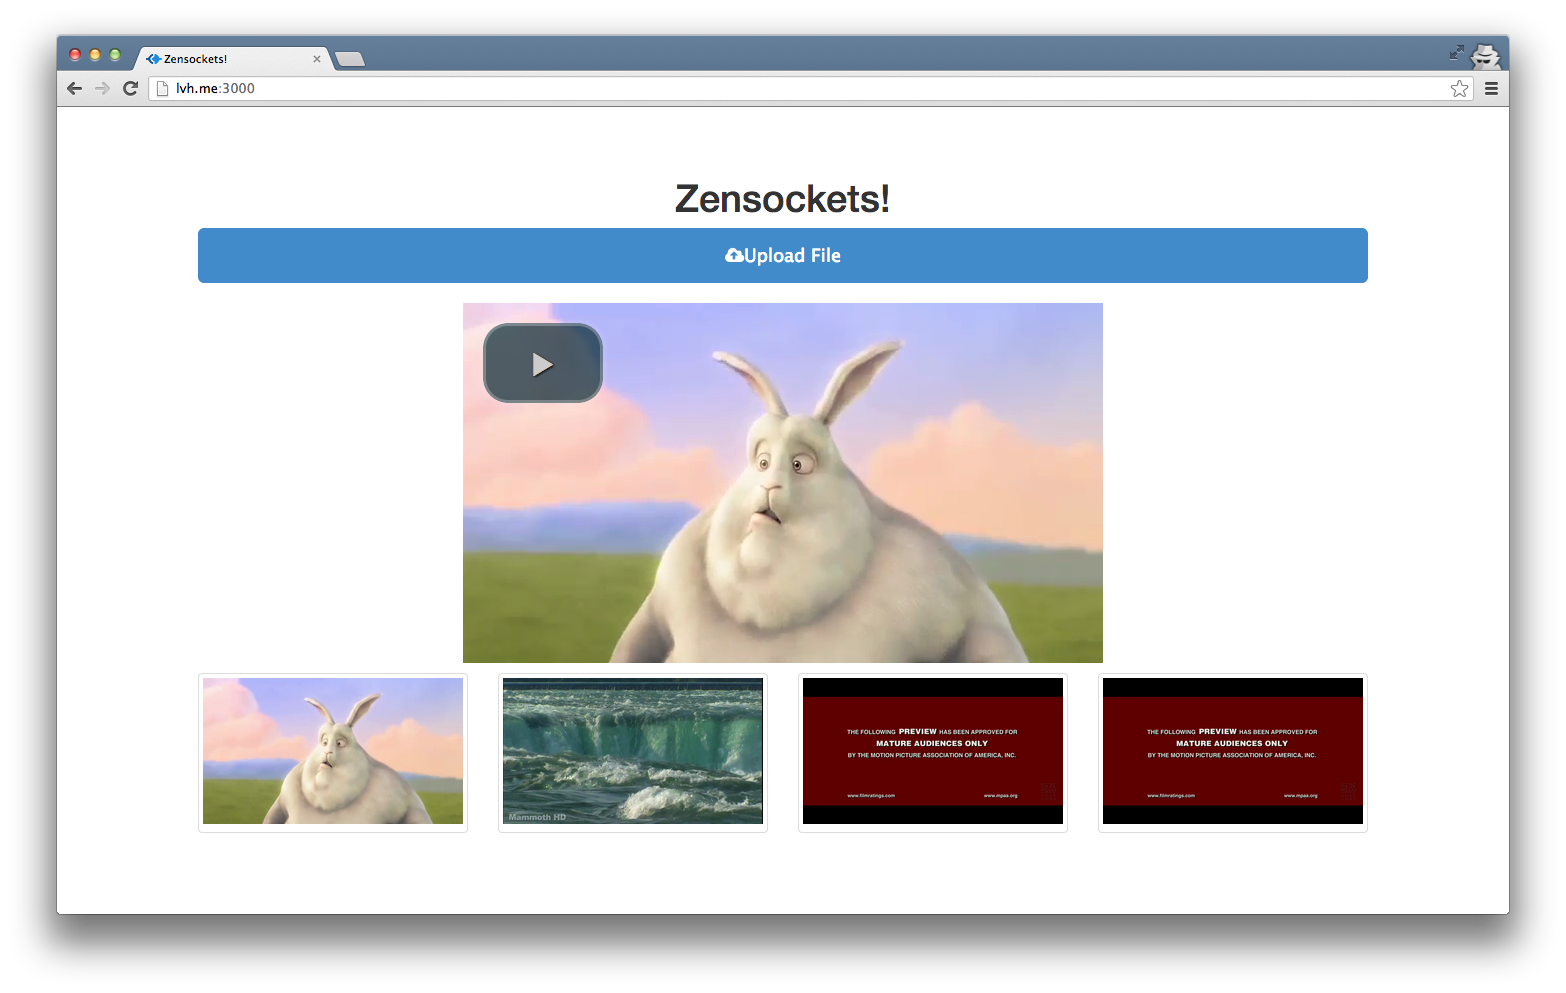
}Now if you upload a video, it should simply add another thumbnail to the current list.
Showing a player from a saved document
Right now if you were to click a link it will take you to a page that doesn't exist yet. We want to create a new player with the sources from the database, so we'll need to make a new route. Since this is starting to get a little out of the scope of this blog post's goal, I'm going to run through this pretty quick. The code examples have plenty of comments though, if you want to read into it more.
Create a new route to grab a specific video file (/media/:id). Since we'll be loading this data via AJAX, this can just output the document directly as JSON. Add this route to app.js.
// GET /media/:id
// Retrieve specific media item
app.get('/media/:id', function(req, res) {
  // Find just one media document matching that ID
  Media.findOne({_id: req.params.id}, function(err, media) {
    if (err){ res.send(500); return; }
    // If a document with that ID is found, return it.
    if (media) {
      res.send(200, {media: media});
    } else { // No document found :( 404 and a message, then.
      res.send(404, {message: 'Media not found'});
    }
  });
});
Now we need to use this information in our view to show a new player. I just took the player code we ripped out before and made a new function, showPlayer(), that accepts a file argument. In script.js:
function showPlayer(file) {
  // If there's already a player, get rid of it cleanly.
  if ($('#transcoded').length > 0) { videojs('#transcoded').dispose(); }
  // Create a new video element
  $('#outputs').html('<video id="transcoded" class="video-js vjs-default-skin" height="360px" width="640" poster="'+file.thumbnail.url+'"></video>');
    // Iterate over the outputs available and add them to the sources.
    $.each(file.outputs, function(index, value) {
      // we only have two outputs, so if it's not mp4 it's webm
      if (value.format == 'mpeg4') {
        sources.push({type: "video/mp4", src: value.url});
      } else {
        sources.push({type: "video/webm", src: value.url});
      }
    });
    // set the source
    video.src(sources);
  });
}
The only major changes that need to be made are that we cleanly dispose of any current Video.js instances that already exist, and we add the poster image directly to the new video element we created. Now we need to load the JSON from our new route and call this showPlayer() function when a thumbnail is clicked. This is still in script.js:
$('.video-thumb a').click(function(e) {
  e.preventDefault();
  $.getJSON($(this).attr('href'), function(data){
    showPlayer(data.media);
  });
});
Refresh your page and click a link! You should see a new player appear above the list of videos. Clicking other thumbnails should simply switch out the video for the new one.
Like before, you can find all of the source for this walkthrough on GitHub, with a different branch for each step.
- 3_personal-namespace: Starting point from Part 1.
- 4_database: Saving media to a database.
- 5_displaying-database-entries: Displaying media from the database.